Multiplayer Tests
Our automation framework allows you to write and execute multiplayer tests, enabling multiple AI agents to play your game simultaneously. This is essential for testing functionality that requires player interaction, such as lobbies, friend systems, trading, cooperative gameplay, and competitive features.
Writing a Multiplayer Test
To write a multiplayer test, we first need to add more players to a test. This can be done by clicking the “Add Player” button in the test editor action bar.
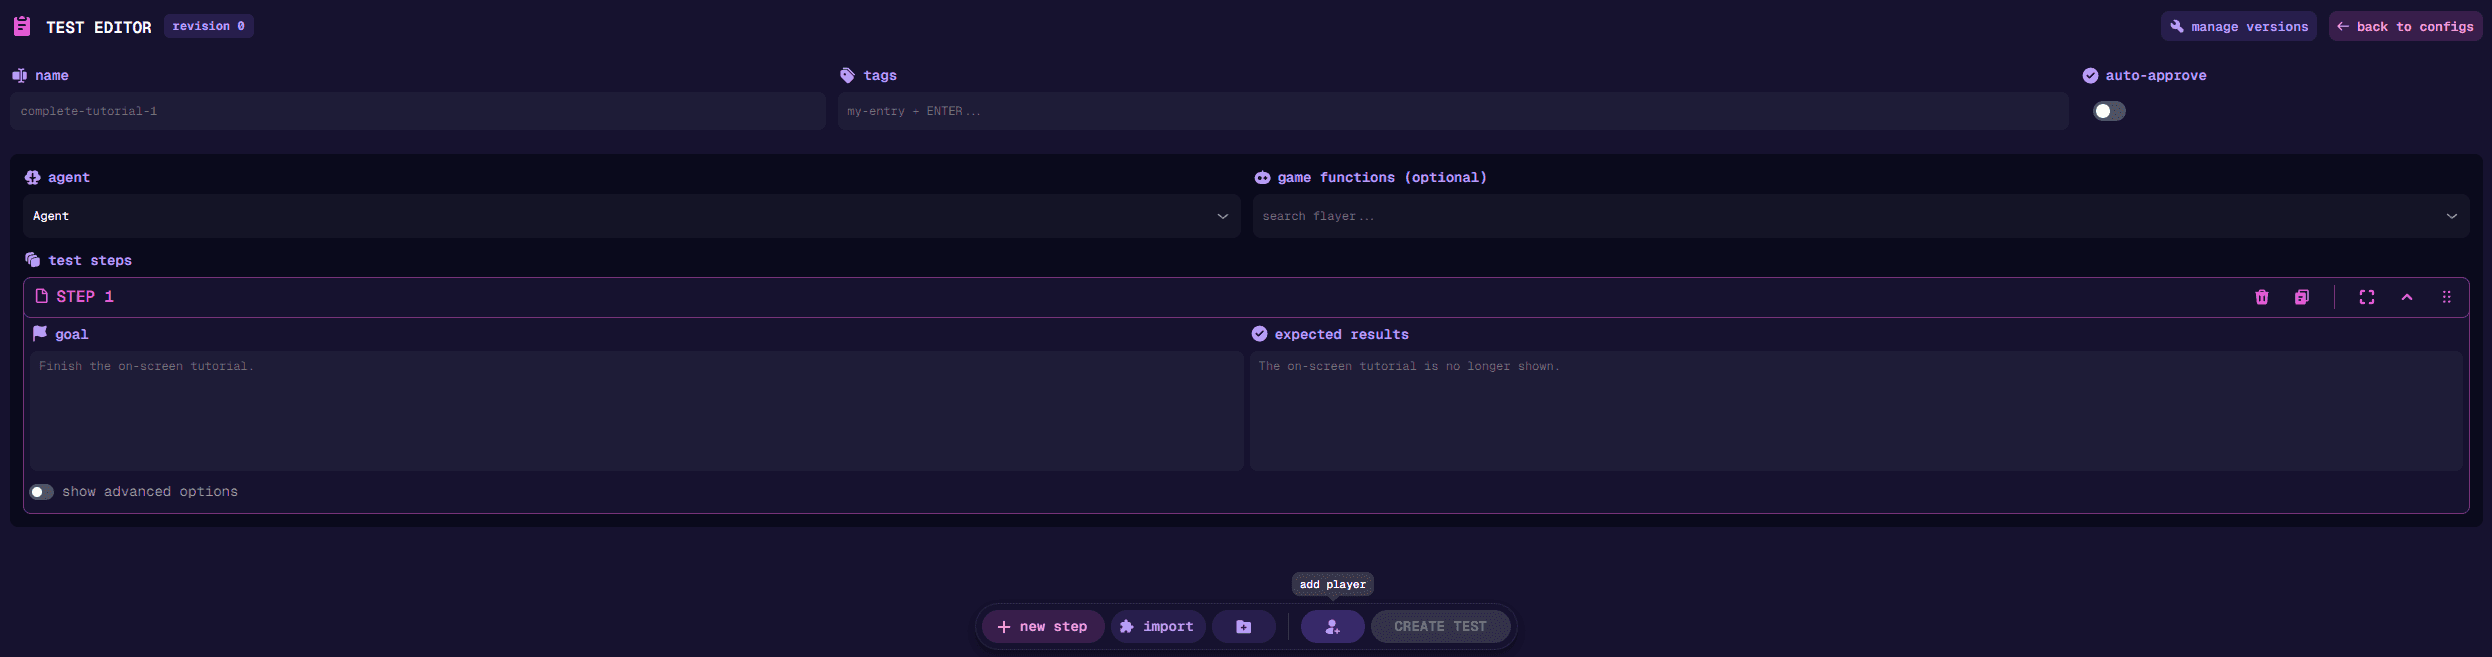
Each player represents a separate game instance controlled by an independent AI agent. You can add as many players as your project has agents available, though keep in mind that:
- More players increase test complexity and maintenance overhead
- Additional players require more computational resources (fewer other tests can run simultaneously + you need more agent hours for the multiplayer test)
- Coordination between many players can be challenging to manage
Player Communication
Each player progresses through its instructions independently. Use the shared message channel and explicit readiness messages to coordinate interactions. Broadcast functions let agents:
- Exchange information (lobby codes, friend IDs, coordinates)
- Coordinate timing (“ready to start”, “waiting at location”)
- Share game state updates (“collected the item”, “reached checkpoint”)
To demonstrate player communication, we can create a simple test where two players exchange messages. The first player sends a message with a list of pokemons, and the second player chooses their favorite pokemon from that list and sends back a response.
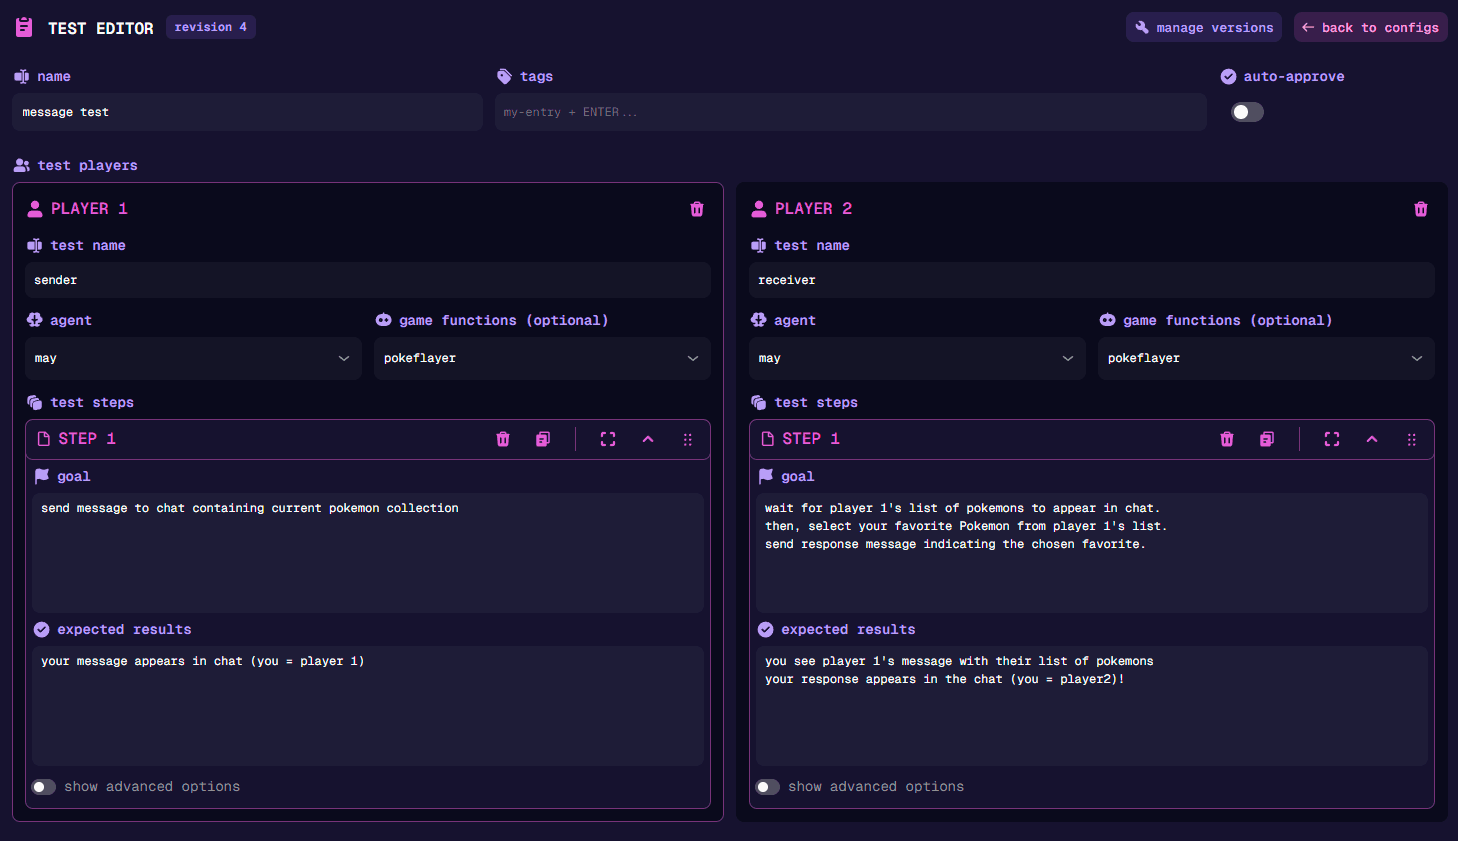
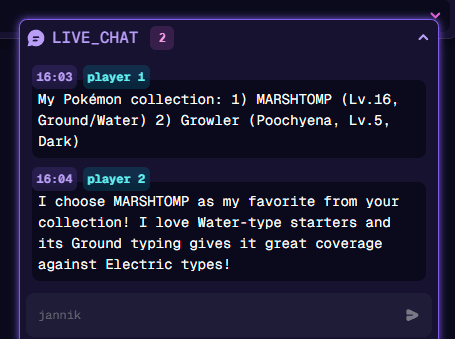
Here we can see the agents messages in the live chat of the test run. The first player sends a list of pokemons, and the second player responds with marshtomp as their favorite pokemon.
Screen Sharing
Screen sharing lets one agent inspect another player’s device during a multiplayer run. Use it when a player needs visual information that cannot be communicated reliably through game state or messages—for example, to confirm that both players reached the same lobby, compare each player’s view of a shared event, or help a player react to what another player sees.
To share a player’s screen:
- Open that player’s show additional options section.
- Select share screen.
- Repeat for every player whose screen should be visible to the other agents.
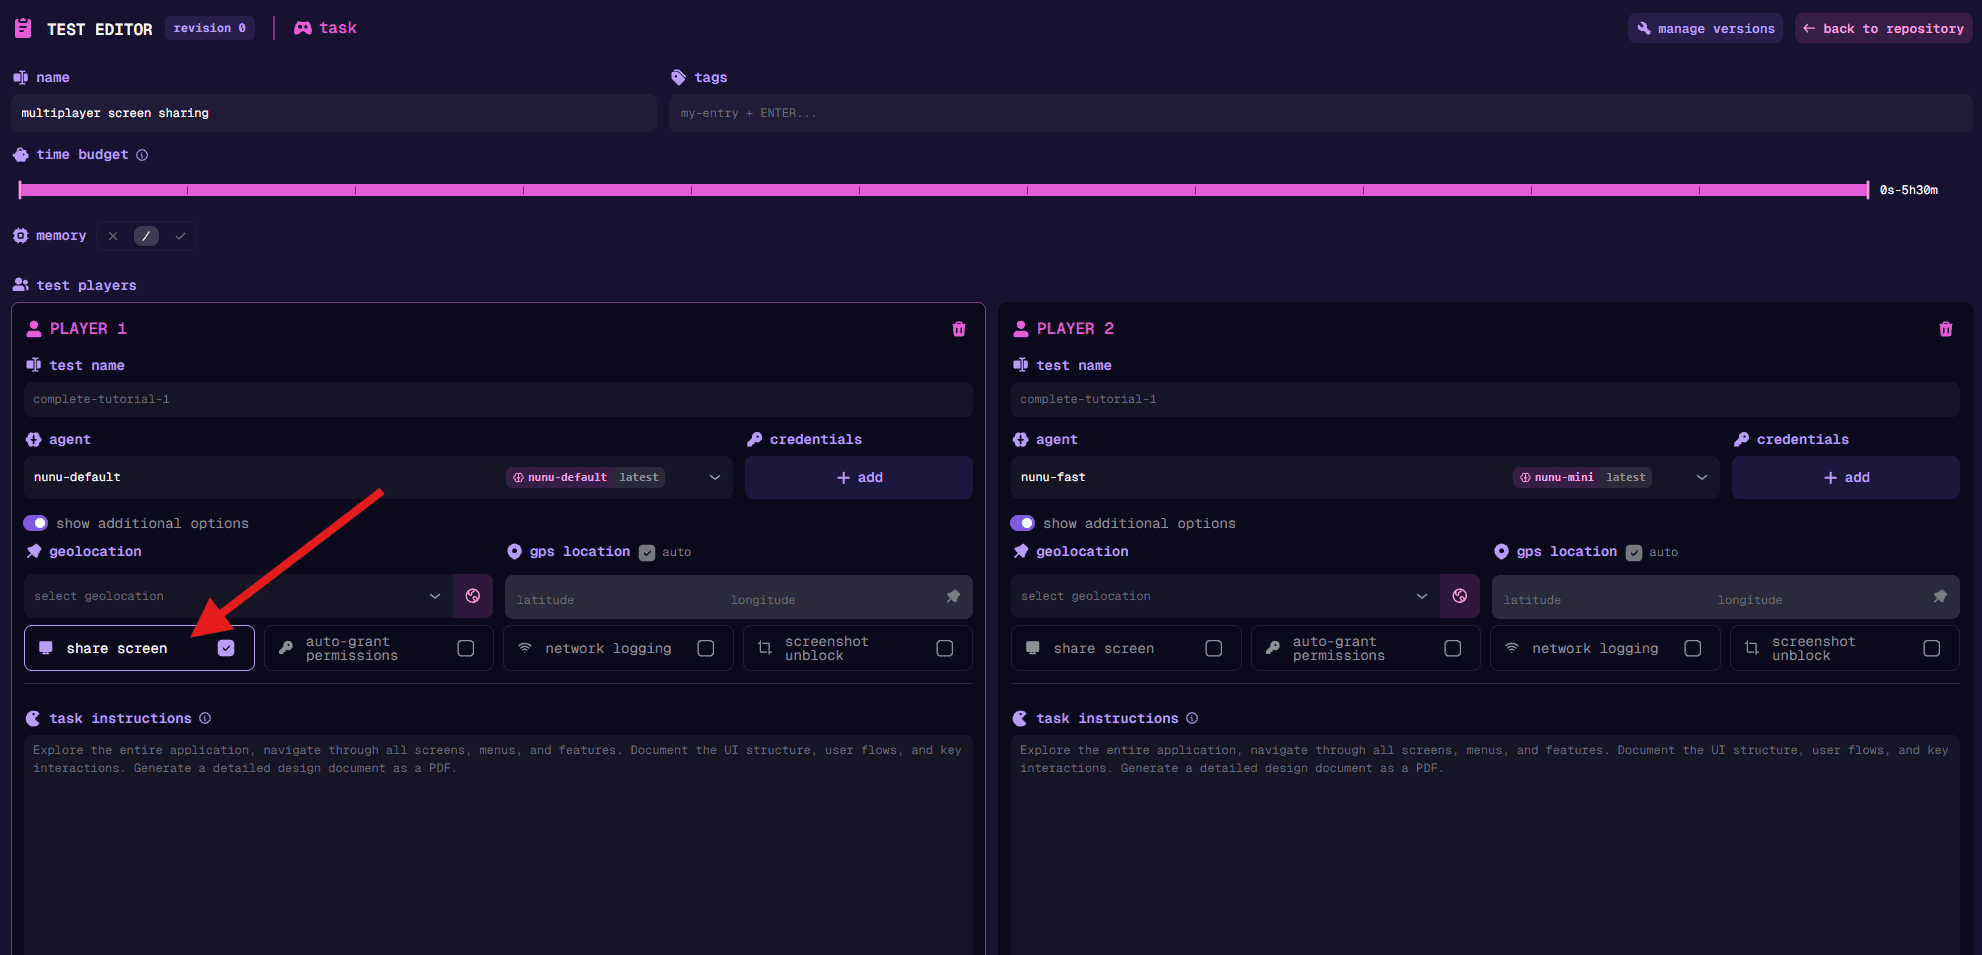
The setting applies to the selected player only. When enabled, every other agent in the test can request a fresh screenshot from that player’s device. Screen sharing does not continuously stream video, interrupt the sharing agent, or add the screenshot to the sharing agent’s context.
Write the viewing player’s instructions so it is clear when and why to inspect the shared screen. Refer to players by their number, which matches the one-based PLAYER 1, PLAYER 2, and subsequent labels in the editor.
Suppose Player 1 creates a private lobby while Player 2 joins it. Enable share screen for Player 1, then give Player 2 an instruction such as:
After joining the lobby, inspect Player 1’s shared screen. Verify that both players see the same lobby members and ready state before continuing.
The agent is told which player screens are available and can capture the current view when it reaches that instruction.
Screen sharing is available only while the sharing player’s agent run is active. If that player finishes, disconnects, or cannot capture its device, the requesting agent receives an error instead of a stale image.
Cross-Platform Multiplayer
Multiplayer tests can also run their players on different platforms (e.g. player 1 on PC, player 2 on mobile) to validate cross-play features. There are two ways to configure this:
- Single test runs: toggle configure each player separately in the start test dialog to pick a deployment config and build per player. This is all-or-nothing: with the toggle on you configure every player individually, otherwise the single selected config is used for all players.
- Test plans: assign players to deployment slots; any player without an assignment runs on the plan’s default config. See Cross-Platform Test Plans.