Getting Started with Unity
Installation
-
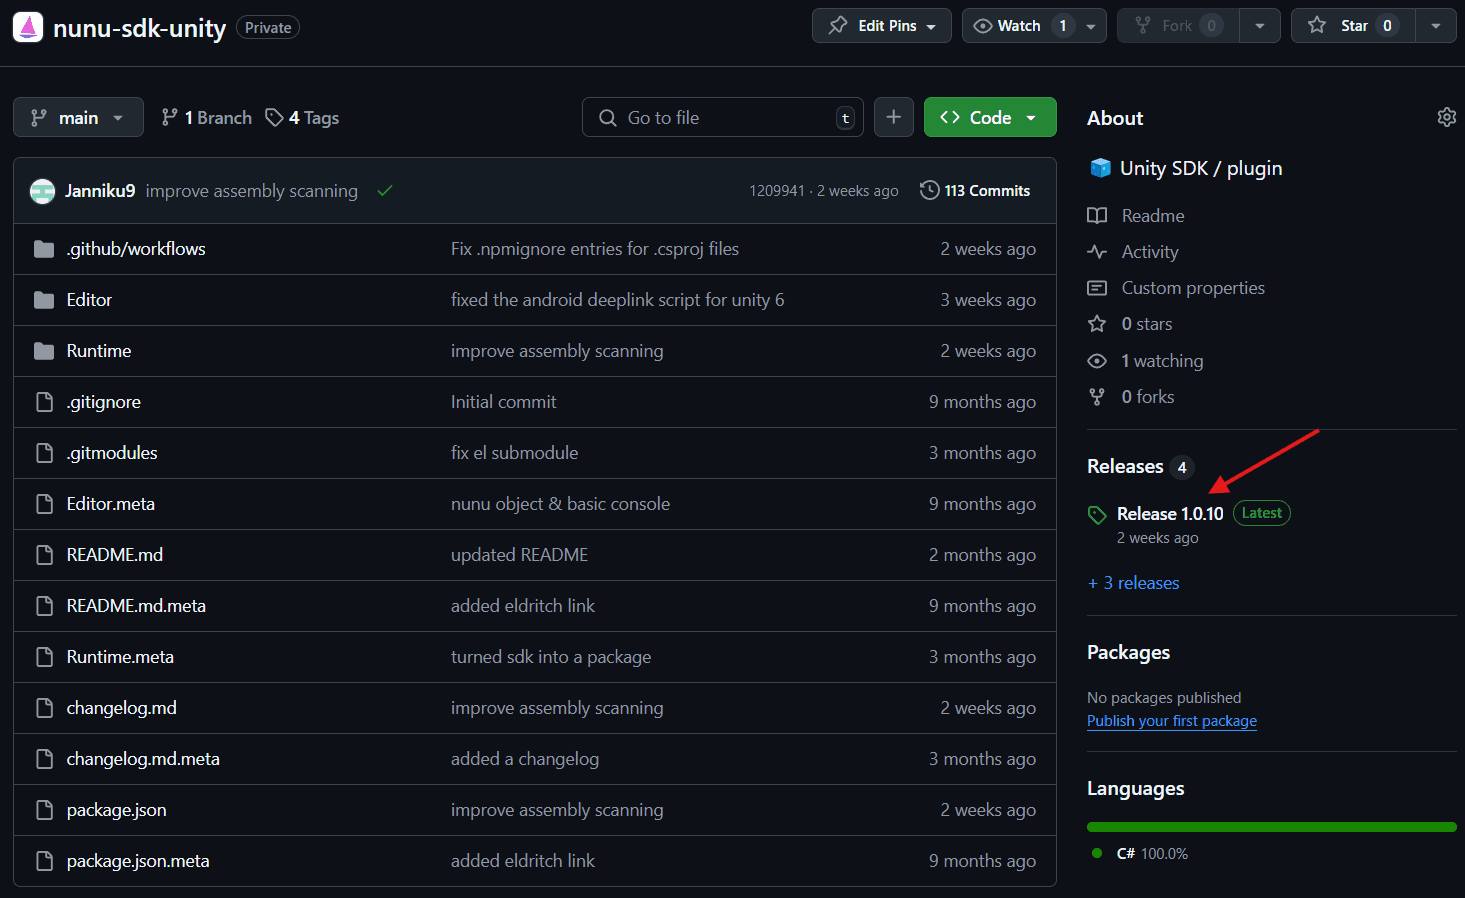
Before you can access the SDK, you must be invited to the nunu-ai-hub Github organization by the nunu team. If you haven’t been invited yet, you’ll see a 404 error when trying to access the repository. Please contact the nunu team via Slack or email (team@nunu.ai) to request access.
-
Once you have access, sign in on Github and download the newest Release of the nunu SDK from our Github (e.g. nunu-sdk-unity-1.0.10.tgz).
-
In the Unity editor, navigate to:
Window > Package Manager -
Click the ”+” icon and select “Add package from tarball…”
-
Select the
nunu-sdk-unitypackage -
Wait for the package to be installed
-
After import, locate the
NunuSdkUnityfolder in your Project window under Packages. -
Find the
NunuManagerprefab inNunu SDK Unity > Runtime > NunuManager- this is the core component you’ll need -
Drag the
NunuManagerprefab into your main scene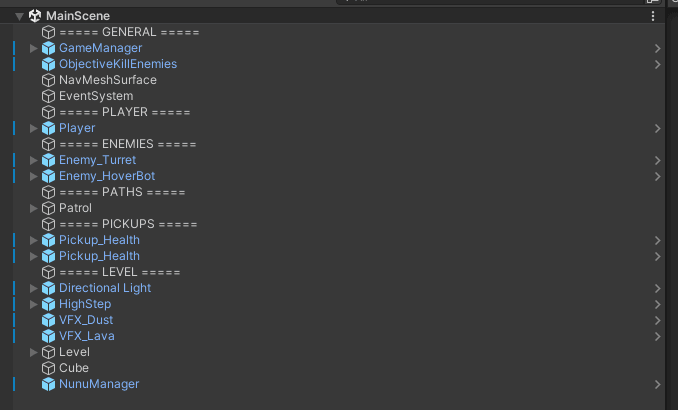
-
The SDK starts in a disabled state for development convenience. To activate it go
Tools > Nunu SDK > Active Statusin the top menu.
-
When clicking on the Nunu manager and opening the Inspector you should see
Console Hotkeysunder the ‘Nunu SDK Configuration’ section and expanding Element 0.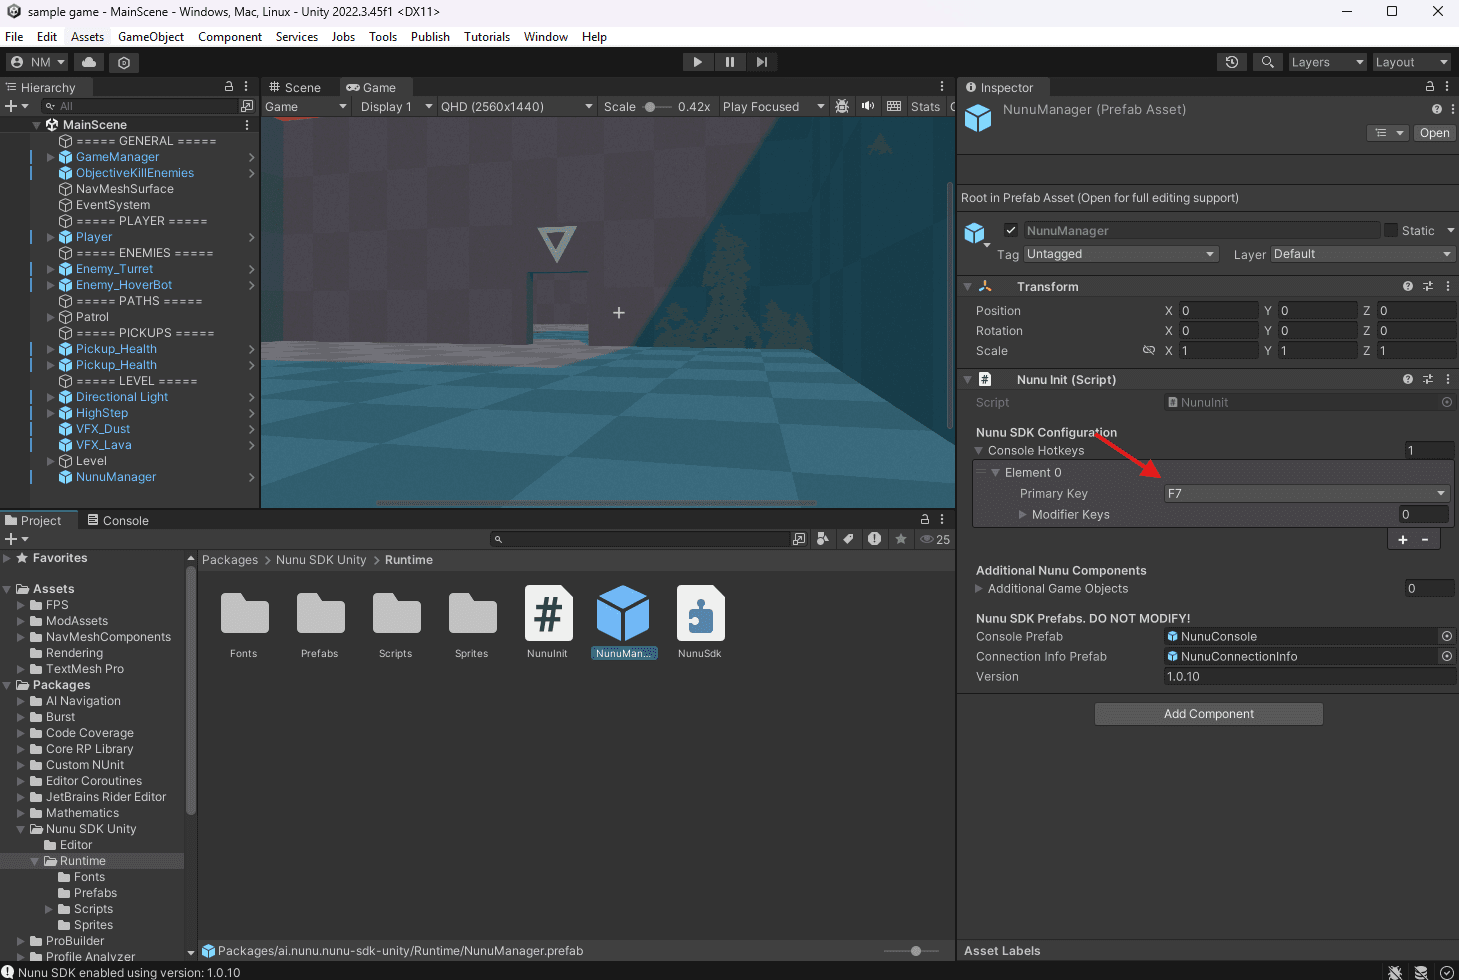
-
Set it to a key that won’t conflict with your game controls
-
That’s already it! The most basic version of the SDK is now already ready!
By default the SDK is excluded from builds. Check the Build Configuration guide to learn how to include the SDK in your builds. This is especially important for mobile games, where you need to enable Deep Linking.
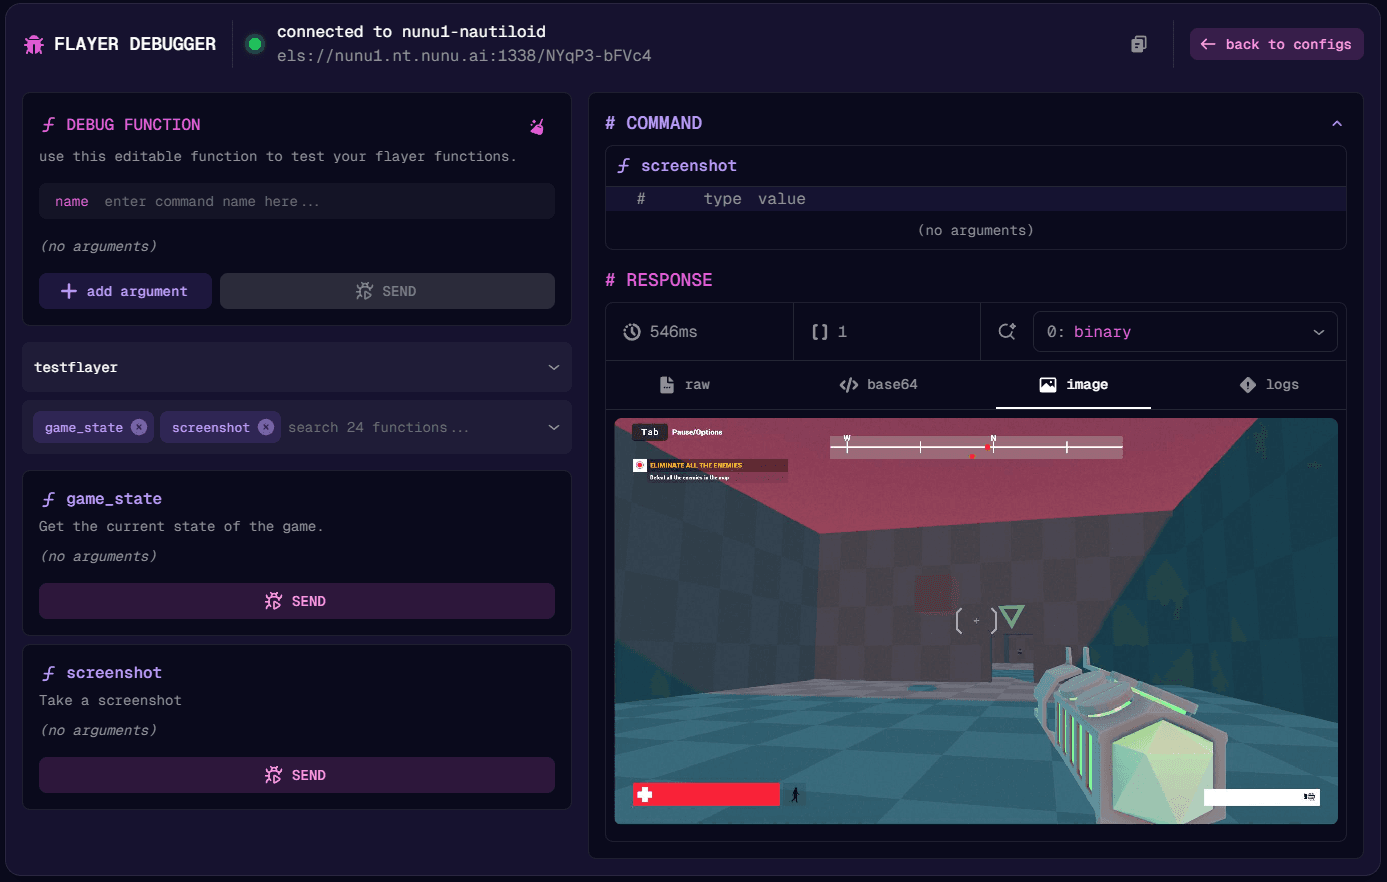
Connecting to the Debugger
The debugger ()
-
Start your game in the Unity Editor. You might get asked to import TMP Essentials if you haven’t done already. Just click on “Import Essentials”
-
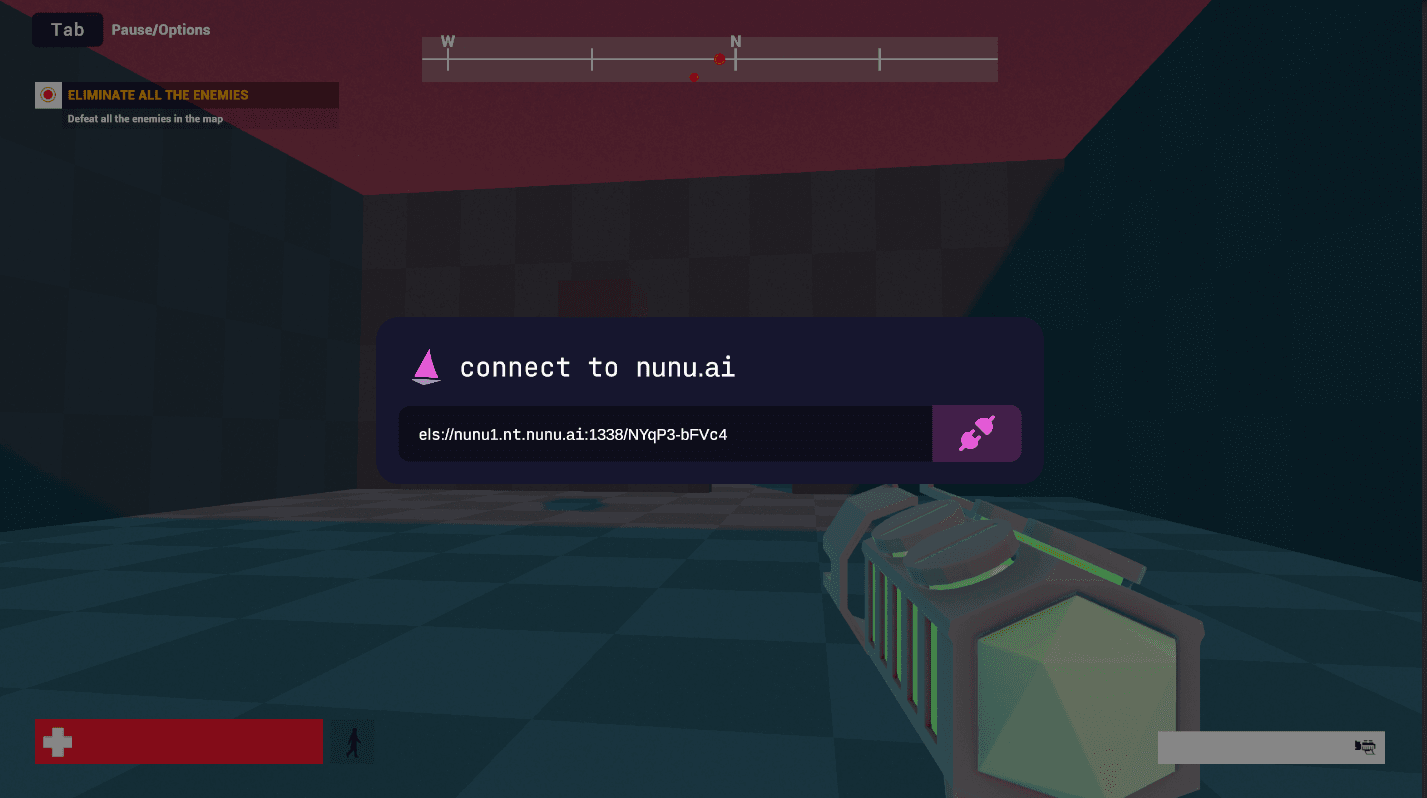
Open the console window by pressing the hotkey you defined in the Installation section (default is F7). You should now see a console window similar to this one. Go grab a connection string from the flayer debugger on nexus and paste it in the console window. Press enter to connect.
-
If the connection was successful you can now run commands from the debugger in the game. Try game state command!
Writing the first flayer function
Here’s a step-by-step guide on how to implement Flayer functions in your Unity project:
- Create a new folder in your Unity project’s Assets directory where you want to store all custom Flayer functions that bridge the SDK with your game.
- Inside the new folder, create a new C# script with a static class. This is where you’ll implement your Flayer function.
- You need to ensure that all code related to the SDK is wrapped in
#if USE_NUNU_SDKand#endifpreprocessor directives. This is crucial to prevent compilation errors when the SDK is disabled.
In the example below, we define a NavigationFunctions class with a HandleNavigateToObject Flayer function. The function takes two arguments: the target GameObject name and the stopping distance. It validates the required GameObjects, retrieves a path from the player’s position to the target using PathManager, and moves the character along the waypoints until within the stopping distance. Relevant information is logged throughout the process.
#if USE_NUNU_SDK
using System.Collections;
using UnityEngine;
using Nunu.Flayer;
using Nunu.Network;
using Nunu.Network.Logging;
using Nunu.Network.Types;

public static class NavigationFunctions
{
    [FlayerFunction("navigate_to_object", description: "navigates to the given object", yieldReturnType: typeof(bool))]
    public static IEnumerator HandleNavigateToObject(string objectName, float stopDistance, PacketLogger logger)
    {
        GameObject targetObject = GameObject.Find(objectName);
        if (targetObject == null)
        {
            logger.Log($"Could not find object named '{objectName}'", LogLevel.Warning, sendToAI: true);
            yield return false;
            yield break;
        }

        // Find main player controller component
        PlayerController playerController = Object.FindObjectOfType<PlayerController>();
        if (playerController == null)
        {
            logger.Log("Could not find PlayerController component", LogLevel.Error, sendToAI: true);
            yield return false;
            yield break;
        }

        // Get path manager component
        PathManager pathManager = Object.FindObjectOfType<PathManager>();
        if (pathManager == null)
        {
            logger.Log("Could not find PathManager component", LogLevel.Error, sendToAI: true);
            yield return false;
            yield break;
        }

        logger.Log($"Calculating path to {objectName}");

        // Get path from current position to target
        Vector3[] path = pathManager.GetPath(playerController.transform.position, targetObject.transform.position);
        if (path == null || path.Length == 0)
        {
            logger.Log("Could not find valid path to target", LogLevel.Warning, sendToAI: true);
            yield return false;
            yield break;
        }

        logger.Log($"Following path with {path.Length} waypoints");

        // Follow the path
        int currentWaypoint = 0;
        while (currentWaypoint < path.Length)
        {
            // Move towards current waypoint
            Vector3 waypoint = path[currentWaypoint];
            float distanceToWaypoint = Vector3.Distance(playerController.transform.position, waypoint);

            // If close enough to waypoint, move to next one
            if (distanceToWaypoint < 0.5f)
            {
                currentWaypoint++;
                if (currentWaypoint < path.Length)
                {
                    logger.Log($"Reached waypoint {currentWaypoint}/{path.Length}");
                }
                continue;
            }

            // Calculate direction and move
            Vector3 direction = (waypoint - playerController.transform.position).normalized;
            playerController.Move(direction);

            // Check distance to final target
            float distanceToTarget = Vector3.Distance(playerController.transform.position, targetObject.transform.position);
            if (distanceToTarget <= stopDistance)
            {
                logger.Log($"Reached target {objectName}", LogLevel.Info, sendToAI: true);
                yield return true;
                yield break;
            }

            // Progress update every second
            if (Time.frameCount % 60 == 0)
            {
                logger.Log($"Distance to target: {distanceToTarget:F2} units, following waypoint {currentWaypoint + 1}/{path.Length}",
                    sendToAI: true);
            }

            yield return null;
        }

        logger.Log("Finished following path but did not reach target", LogLevel.Warning, sendToAI: true);
        yield return false;
    }
}
#endif
With the Flayer function implemented, the SDK will automatically discover and register it when the game starts. The function will now be accessible to the AI agent for invocation.