Flayer Function Libraries
Flayer Function Libraries serve as the foundation for extending your game’s AI capabilities. At their core, these libraries are specialized classes inheriting from UFlayerFunctionLibrary, managed by the NunuSubsystem, enabling seamless integration of custom functions into your game.
How It Works
Under the hood, the libraries are just regular UObjects implementing the TickableGameObject interface. The NunuSubsystem provides them with a WorldContextObject giving them full access to the game world and its objects. This powerful combination allows you to create complex operations that can track state and execute long-running tasks without blocking the game thread.
You can implement these libraries in both C++ and Blueprints, each offering distinct advantages:
C++ libraries offer maximum flexibility and performance. They’re automatically registered through UHT (Unreal Header Tool) reflections and provide complete access to the Unreal Engine API. This makes them ideal for complex operations and high-performance requirements.
The main trade-off is the need for recompilation when making changes, which can slow down iteration time during development. However, the power and flexibility often outweigh this inconvenience for core functionality.
Consider using C++ when you need:
- Complex promise operations
- High-performance requirements
- Deep engine integration
Blueprint libraries excel in rapid prototyping and iteration. They provide a visual approach to function creation and don’t require recompilation when making changes. This makes them perfect for quick experiments and simpler functionality.
While they may have some limitations in terms of advanced features and performance compared to C++, their ease of use and quick iteration time make them invaluable for many use cases.
Blueprint libraries are ideal for:
- Rapid prototyping
- Simple game state queries
- Basic game flow control
Library Lifecycle
The NunuSubsystem manages the complete lifecycle of your function libraries. During initialization, it performs several key steps:
- Scans for code libraries through reflection
- Registers both code and blueprint libraries
- Creates instances and provides WorldContextObject access
- Handles cleanup during level changes and shutdown
This automated management ensures proper initialization, execution, and cleanup of your libraries throughout the game’s runtime.
Understanding Flayer Functions
Flayer functions form the building blocks of your AI interaction system. Each function serves as a bridge between your game and the AI agent, following specific design principles to ensure reliable operation.
Function Requirements
A Flayer function is a function that:
- Is a
UFUNCTION - ALWAYS returns a primitive type or a FFLayerPromise
- Has an arbitrary amount of primitive arguments
- ALWAYS must have a
PacketLoggerargument at the end - And it must be registered in the library over the blueprint node or a code macro
Execution
Flayer functions are called by the AI agent over a network protocol called Eldritchlink. This protocol allows the AI agent to remote execute the registered flayer functions by sending a packet, containing the function name and the arguments.
The arguments are serialized from so called DynamicParams that are passed to the function.
The function is then executed on the MAIN game thread and the result is sent back to the AI agent over the same network protocol.
Therefore if you want to write a Flayer function that runs over multiple frames or ticks, you need to use a FFlayerPromise as the return type. This allows you to yield the function execution and wait for the result to be sent back to the AI agent.
Simple functions like cheats, game state queries can always be written as a single frame function and return a primitive type.
More complex functions, like navigation or camera manipulation, are usually writtten as a multi frame function and return a FFlayerPromise, because we need to wait multiple frames for the operation to finish.
For more information on Flayer promises work check out the Flayer Promises section.
Practical Examples
Let’s look at some real-world examples of Flayer functions in action:
Here’s a Lyra example of a cheat command that toggles God Mode for the player. This function is synchronous and returns a boolean indicating success or failure. Additionally, it logs messages to the AI agent indicating the current state of God Mode.
#pragma once
#include "LyraGameplayTags.h"
#include "AbilitySystem/LyraAbilitySystemComponent.h"
#include "Flayer/FlayerFunctionLibrary.h"
#include "Kismet/GameplayStatics.h"
#include "Network/PacketLogger.h"
#include "Player/LyraPlayerController.h"
#include "MyCheatLibrary.generated.h"

UCLASS()
class UMyCheatLibrary : public UFlayerFunctionLibrary
{
	GENERATED_BODY()
public:

	UMyCheatLibrary()
	{
		// Register the function with the Flayer system
		REGISTER_FLAYER_FUNCTION_SHORT(ToggleGodMode, "toggle_god_mode", "Toggles God Mode for the player");
	}

	UFUNCTION()
	bool ToggleGodMode(bool bEnable, UPacketLogger* Logger)
	{
		const UWorld* World = GetWorld();
		if (!World)
		{
			Logger->LogToAI(TEXT("Failed to get world"), ELogLevel::Error);
			return false;
		}

		const ALyraPlayerController* PC = Cast<ALyraPlayerController>(UGameplayStatics::GetPlayerController(World, 0));
		if (!PC)
		{
			Logger->LogToAI(TEXT("Failed to get player controller"), ELogLevel::Error);
			return false;
		}

		ULyraAbilitySystemComponent* LyraAsc = PC->GetLyraAbilitySystemComponent();
		if (!LyraAsc)
		{
			Logger->LogToAI(TEXT("Failed to get ability system component"), ELogLevel::Error);
			return false;
		}

		if (const FGameplayTag Tag = LyraGameplayTags::Cheat_GodMode; LyraAsc->HasMatchingGameplayTag(Tag) && !bEnable)
		{
			Logger->LogToAI(TEXT("God Mode is now disabled"), ELogLevel::Warning);
			LyraAsc->RemoveDynamicTagGameplayEffect(Tag);
		}
		else if (!LyraAsc->HasMatchingGameplayTag(Tag) && bEnable)
		{
			Logger->LogToAI(TEXT("God Mode is now enabled"), ELogLevel::Warning);
			LyraAsc->AddDynamicTagGameplayEffect(Tag);
		}
		else
		{
			Logger->LogToAI(TEXT("God Mode is already in the desired state"), ELogLevel::Warning);
		}

		return true;
	}
};
This function showcases proper error handling, status logging, and immediate return values.
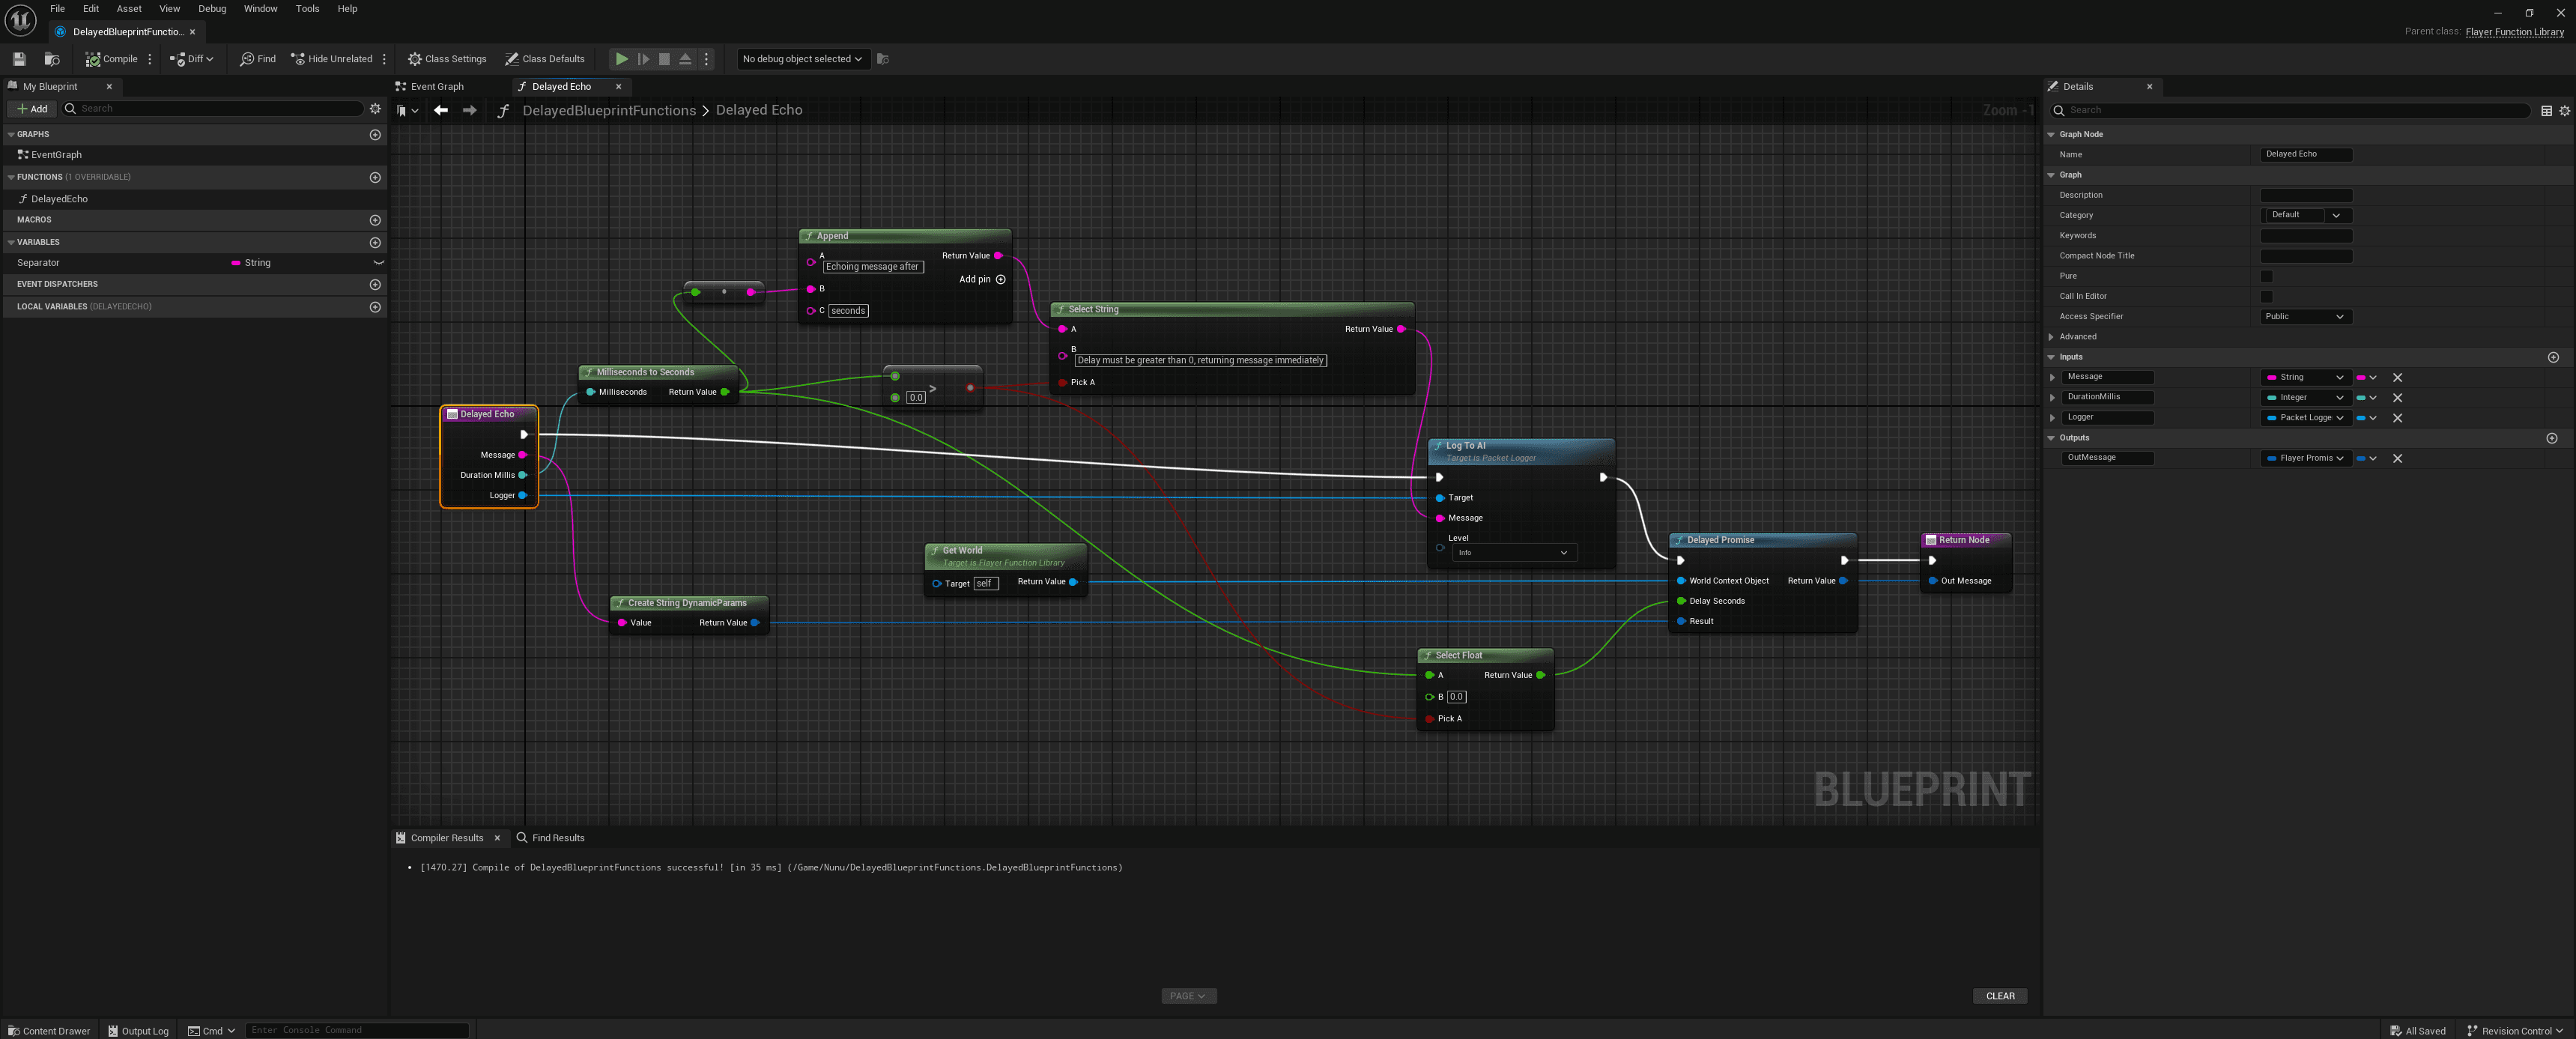
Here’s a very simple example of a delayed echo function. We create a promise that resolves after a specified delay in milliseconds.
#pragma once
#include "Flayer/FlayerFunctionLibrary.h"
#include "Network/PacketLogger.h"
#include "Utils/DynamicParamUtils.h"
#include "Utils/FlayerFunctionUtils.h"
#include "Utils/FlayerPromiseUtils.h"
#include "DelayedFunctions.generated.h"

UCLASS()
class UDelayedFunctions : public UFlayerFunctionLibrary
{
	GENERATED_BODY()
public:

	UDelayedFunctions()
	{
		REGISTER_FLAYER_FUNCTION_SHORT(DelayedEcho, "delayed_echo", "Echoes a message after a specified delay in milliseconds");
	}

	FFlayerPromise DelayedEcho(const FString& Message, int DelayMillis, UPacketLogger* Logger)
	{
		FDynamicParams Result = UDynamicParamUtils::CreateStringDynamicParams(Message);
		float DelaySeconds = UFlayerFunctionUtils::MillisecondsToSeconds(DelayMillis);
		if (DelaySeconds > 0.0f)
		{
			Logger->LogToAI(FString::Printf(TEXT("Echoing message after %.2f seconds: %s"), DelaySeconds, *Message), ELogLevel::Info);
		} else
		{
			Logger->LogToAI(TEXT("Delay must be greater than 0, returning message immediately"), ELogLevel::Warning);
			DelaySeconds = 0.0f;
		}

		// Create a delayed promise that resolves after the specified delay
		return UFlayerPromiseUtils::DelayedPromise(
			GetWorld(),
			DelaySeconds,
			Result
		);
	}

};
Additionally, here is the blueprint version of the same function: