Getting Started with Unreal Engine 5
The unreal engine 5 SDK is a plugin that allows automated log collection, performance testing and offers a framework to increase the AI agent’s capabilities, by writing custom functions called flayer functions.
The heart of the SDK is the NunuSubsystem a GameInstanceSubsystem that handles the lifecycle and connection management of all nunu components.
The SDK works with Unreal Engine 4.27 and newer versions, but we recommend using Unreal Engine 5 for access to the latest features and improvements. Be aware that some features aren’t fully supported in older versions.
Quick Start Guide
Here’s a quick guide on how to install and test the basic nunu sdk integration:
Installation
First, let’s get the SDK up and running in your project:
- Download the latest SDK release from the nunu hub.
- Unzip the package
- Copy the
NunuSDKfolder into your project’sPluginsdirectory and addNunuSDKto your projectBuild.csfile as a dependency.
The nunu plugin is structured as a standard unreal engine plugin. It contains the following 2 modules:
- NunuSDK: The core runtime module that contains the
NunuSubsystemand the core functionality of the SDK. - NunuSDKEditor: The editor module that contains blueprint utilities and editor tools for flayer function development.
Initial Setup
Once you’ve placed the files:
- Wait for your IDE to detect and load the new modules
- Rebuild your project
- Launch the Unreal Engine editor
Configuration
Navigate to Edit > Project Settings > Plugins > NunuSDK to set up your environment:
- Configure your preferred Nunu console hotkey (default: F7)

Pro tip: Choose a key that won’t conflict with your existing game or debug controls
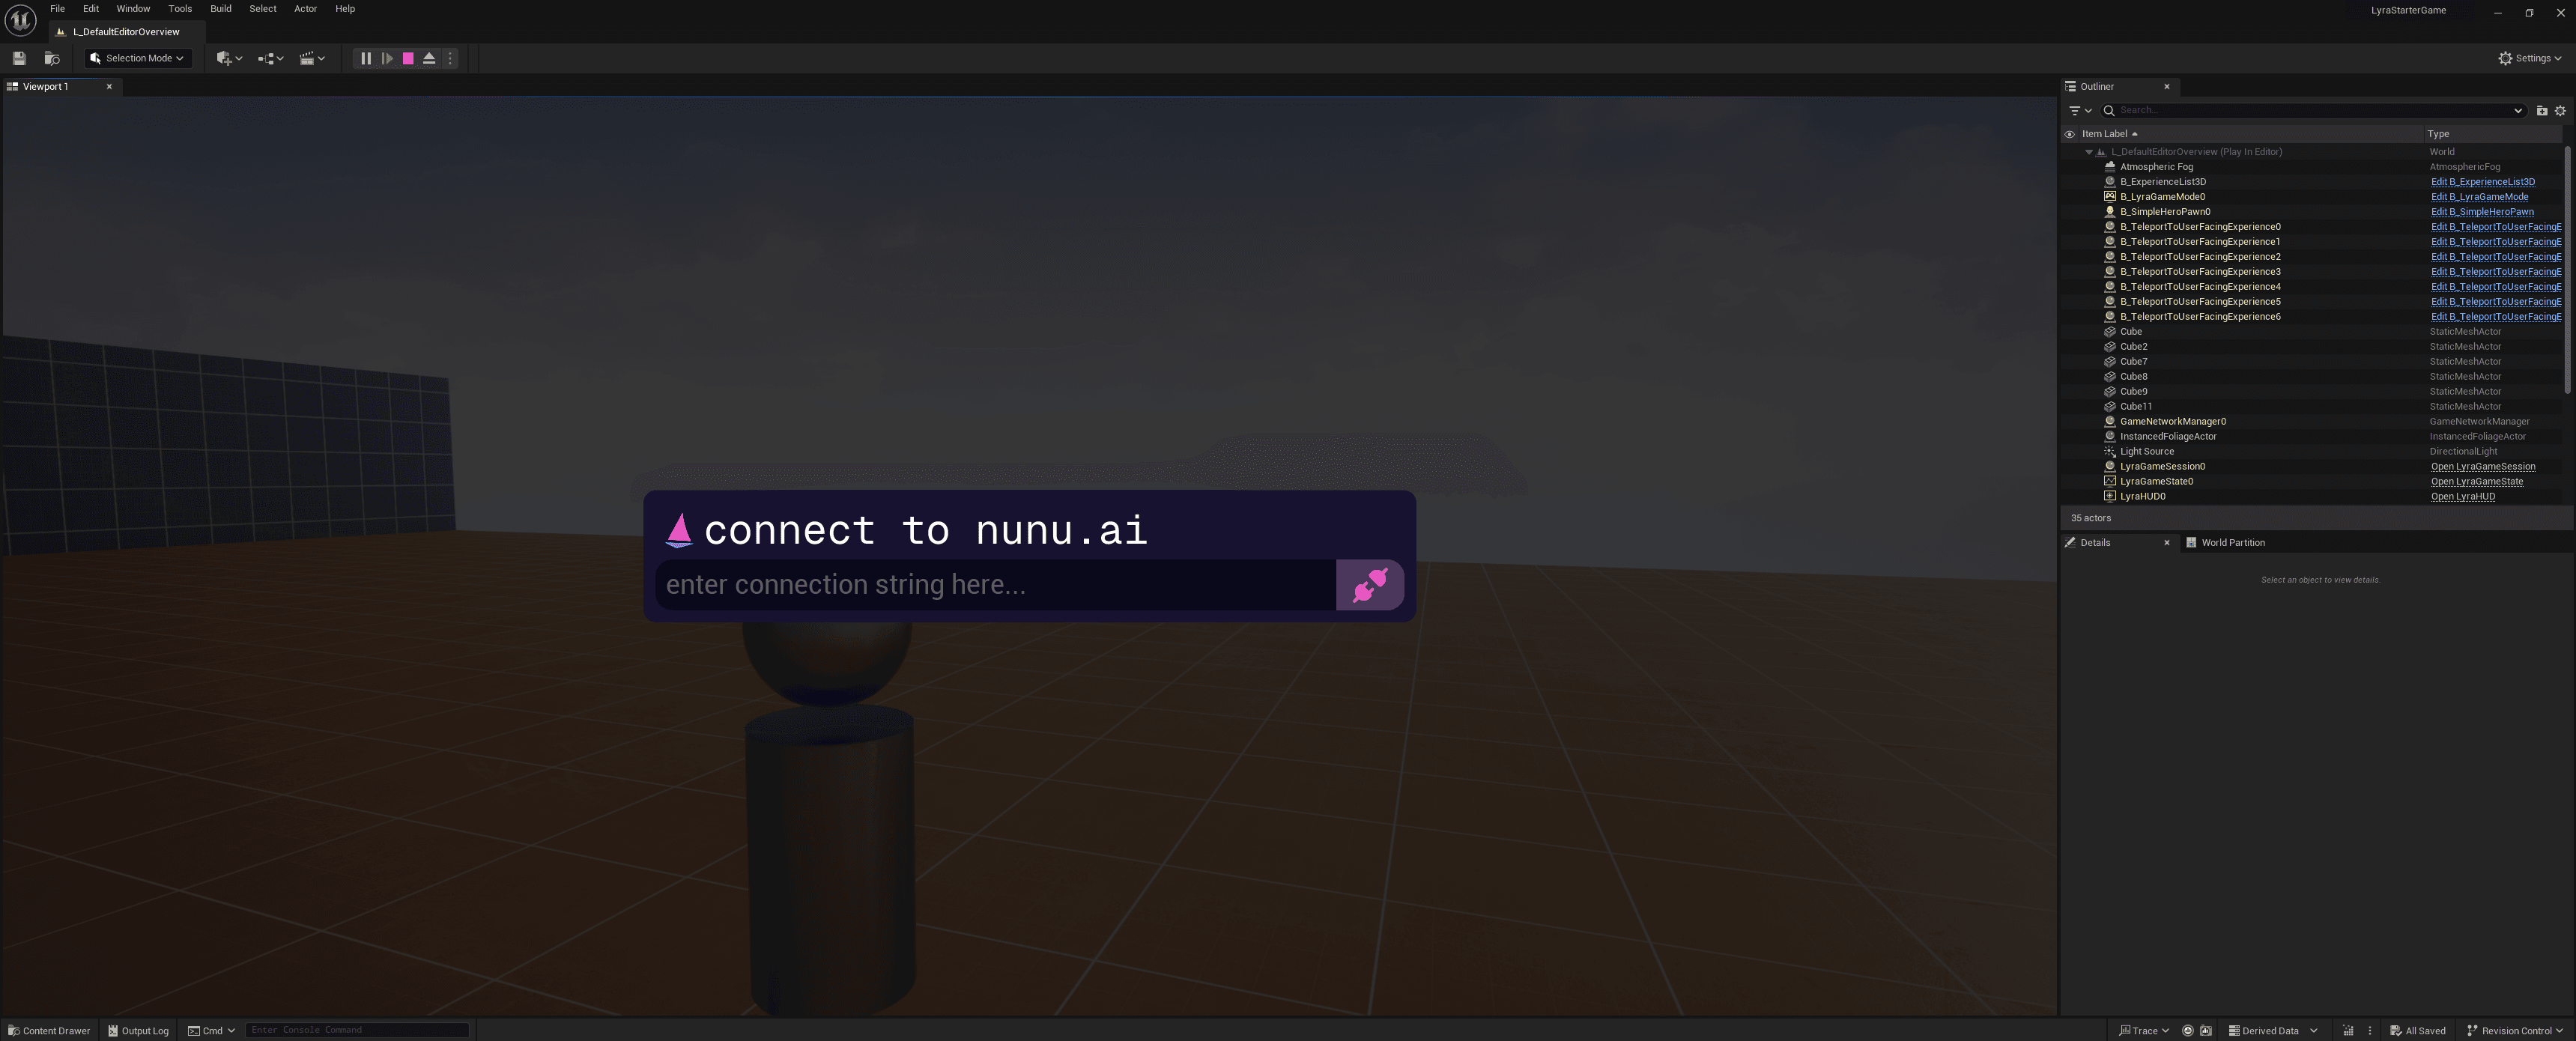
Your First Connection
We are going to test the integration using the flayer debugger. The flayer debugger is a tool that allows you to test and debug your flayer functions.
More info on how to get a connection string can be found in the Flayer Debugger section
Let’s establish communication with the SDK:
- Launch your game in editor play mode
- Press your configured hotkey to open the Nunu console
- Obtain a flayer debugger connection string from Nexus
- Paste the connection string into the console
- Press Enter or click the connect button
Success Indicator: You’ll see a “connected” message replace your connection string.
The console window isn’t available in Unreal Engine 4. Instead, you can
connect using the built-in command: NunuConnect "your_connection_string"
Make sure to put your connection string in double quotes. This method also
works in Unreal Engine 5 as an alternative to the console.
Verification
Now that you’re connected, let’s verify the integration:
- Click on fetch functions to get all available functions from the SDK
- Run the
game_statecommand - You should receive basic game state information in response
Creating Your First Flayer Function
Now that we have our SDK running, let’s explore both approaches to creating custom functions.
Option 1: C++ Implementation
Flayer functions are the core part of expanding the AI agent’s capabilities. For a more in-depth guide on how to write flayer functions in unreal engine, check out the Flayer Functions Libraries section.
To create a flayer function in C++, we’ll build a custom FlayerFunctionLibrary class. Unlike standard Blueprint function libraries, this class provides:
- Access to
WorldContext - A
Tickfunction
The NunuSubsystem handles all instance management and registration automatically.
To create a flayer function, we need to add a new UFUNCTION inside our FlayerFunctionLibrary class. Here are the key requirements:
- Must return a single primitive type (int, float, string, etc.)
- Can receive any primitive type as arguments
- Must have
PacketLoggeras the last argument (used for sending messages to the AI agent)
Let’s create a simple comparison function:
#pragma once
#include "Flayer/FlayerFunctionLibrary.h"
#include "Network/PacketLogger.h"
#include "MyFirstFlayerFunctions.generated.h"

UCLASS()
class UMyFirstFlayerFunctions : public UFlayerFunctionLibrary
{
	GENERATED_BODY()
public:

	UMyFirstFlayerFunctions()
	{
		REGISTER_FLAYER_FUNCTION_SHORT(CompareTwoNumbers, "compare_two_numbers", "Compares two numbers and logs the result");
	}

	UFUNCTION()
	int CompareTwoNumbers(int A, int B, UPacketLogger* Logger)
	{
		if (A > B)
		{
			Logger->LogToAI(TEXT("A is greater than B"));
			return 1;
		}

		if (A < B)
		{
			Logger->LogToAI(TEXT("A is less than B"));
			return -1;
		}


		Logger->LogToAI(TEXT("A is equal to B"));
		return 0;
	}
};
This function demonstrates several key concepts:
- Function registration using
REGISTER_FLAYER_FUNCTION_SHORTmacro - Unique and descriptive packet name (“compare_two_numbers”)
- Clear function description for the flayer debugger
- Proper use of the PacketLogger for AI communication
- Registration in the constructor for proper exposure to the Eldritchlink network client
After recompiling and reconnecting to the flayer debugger, your new function will appear in the available functions list, ready for testing.
Option 2: Blueprint Implementation
For those who prefer visual scripting, let’s create a flayer function using Blueprints. We’ll build a simple string reversal function.
Create Your Blueprint Class
- Right-click in content browser → Blueprint Class
- Search for
FlayerFunctionLibraryand select - Name the new blueprint class
MyFirstFlayerBlueprintFunctionLibrary.
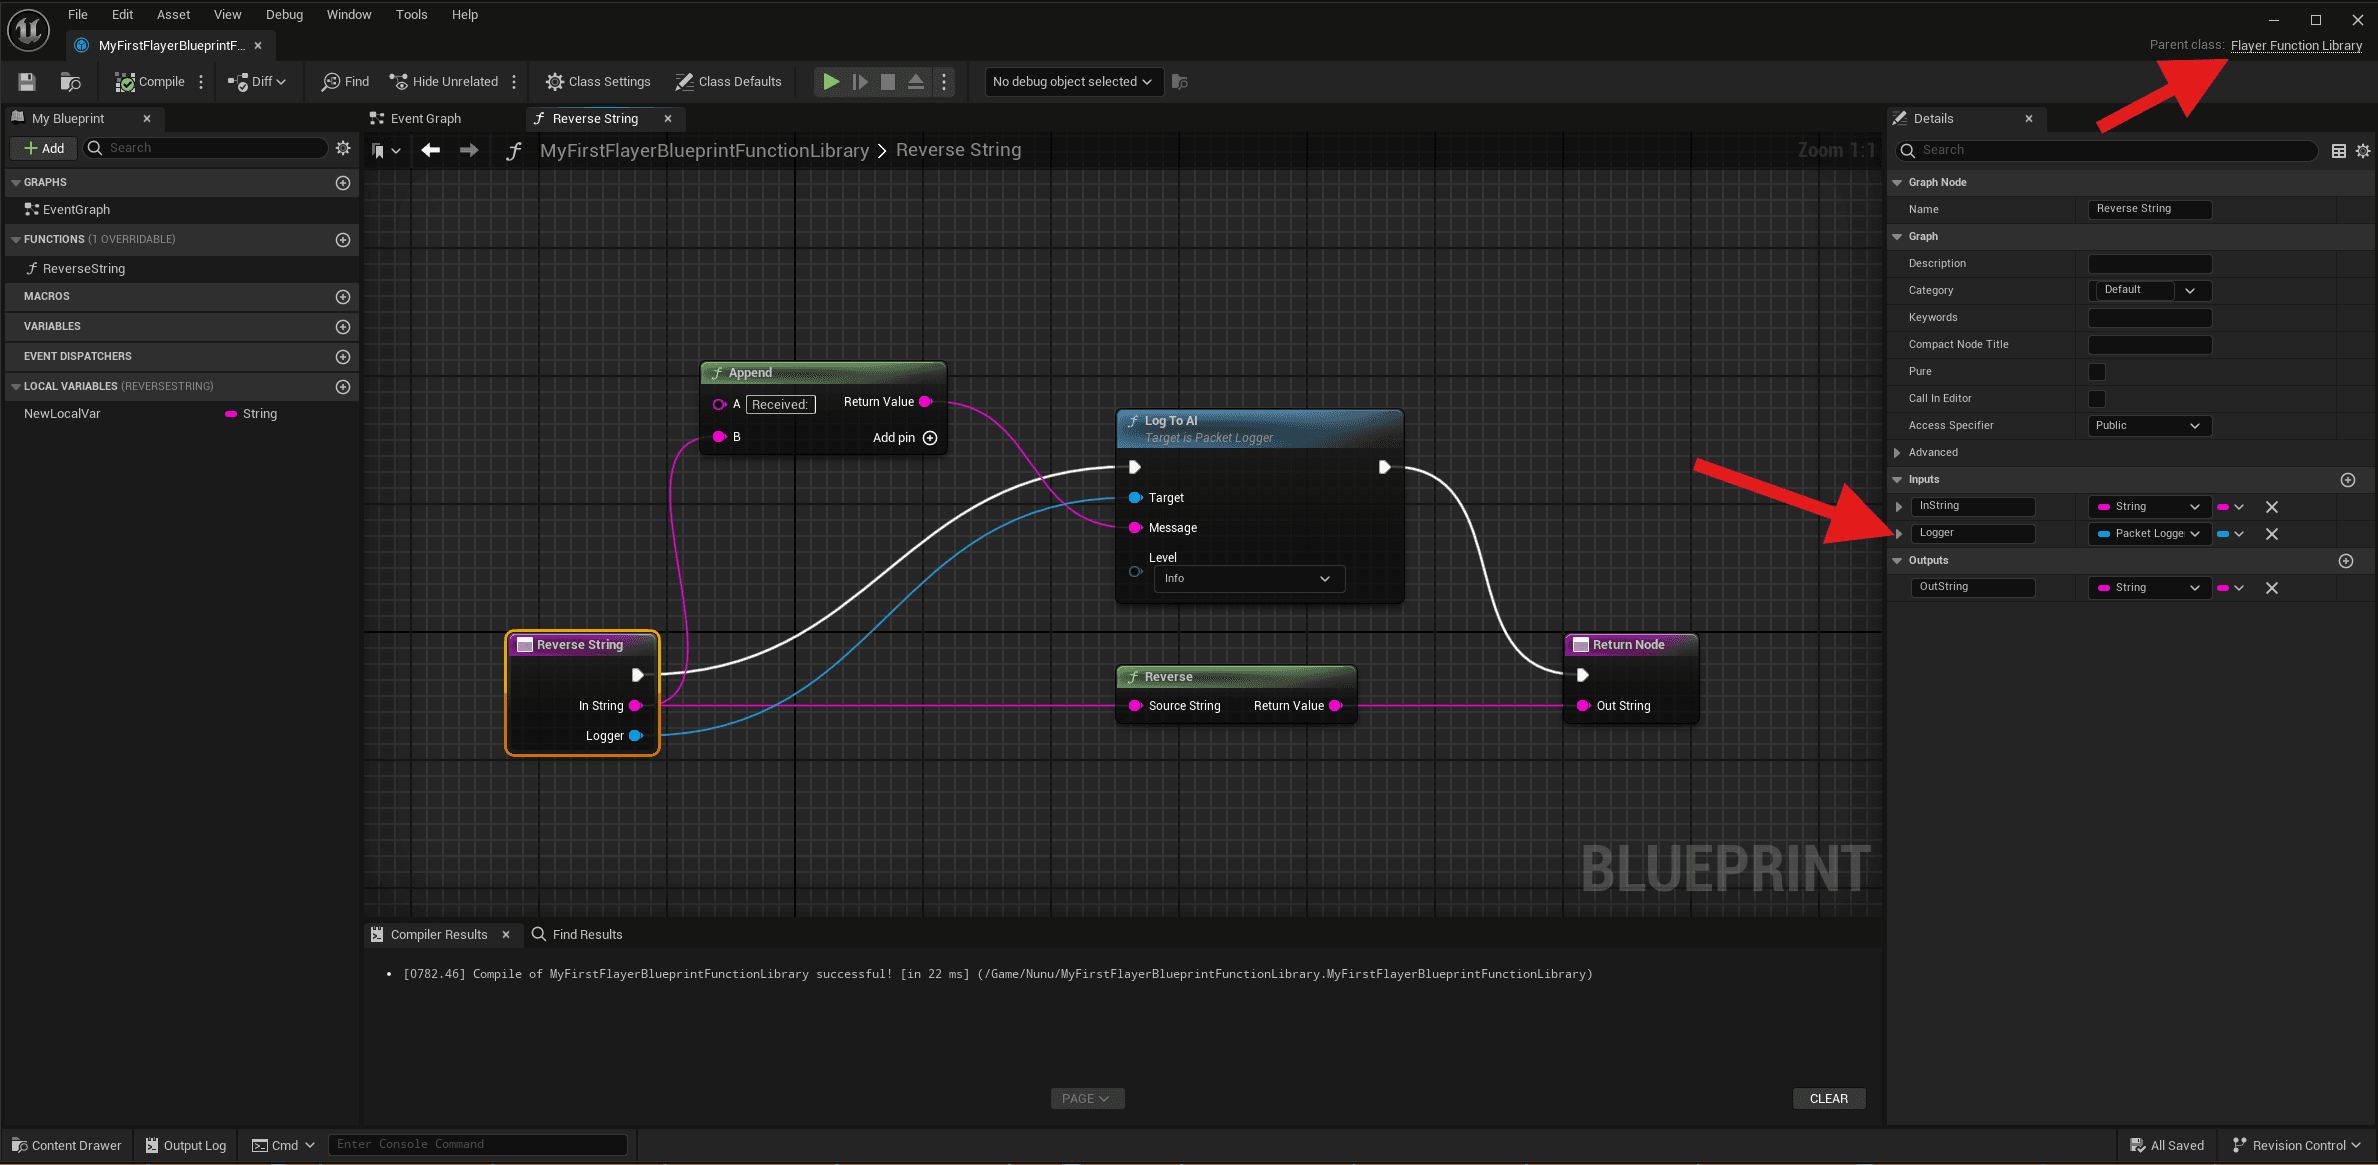
Add Your Function
The key requirements remain the same as C++:
- Must return a single primitive type (int, float, string, etc.)
- Can receive any primitive type as arguments
- Must include
PacketLoggeras the last argument (used for sending messages to the AI agent).
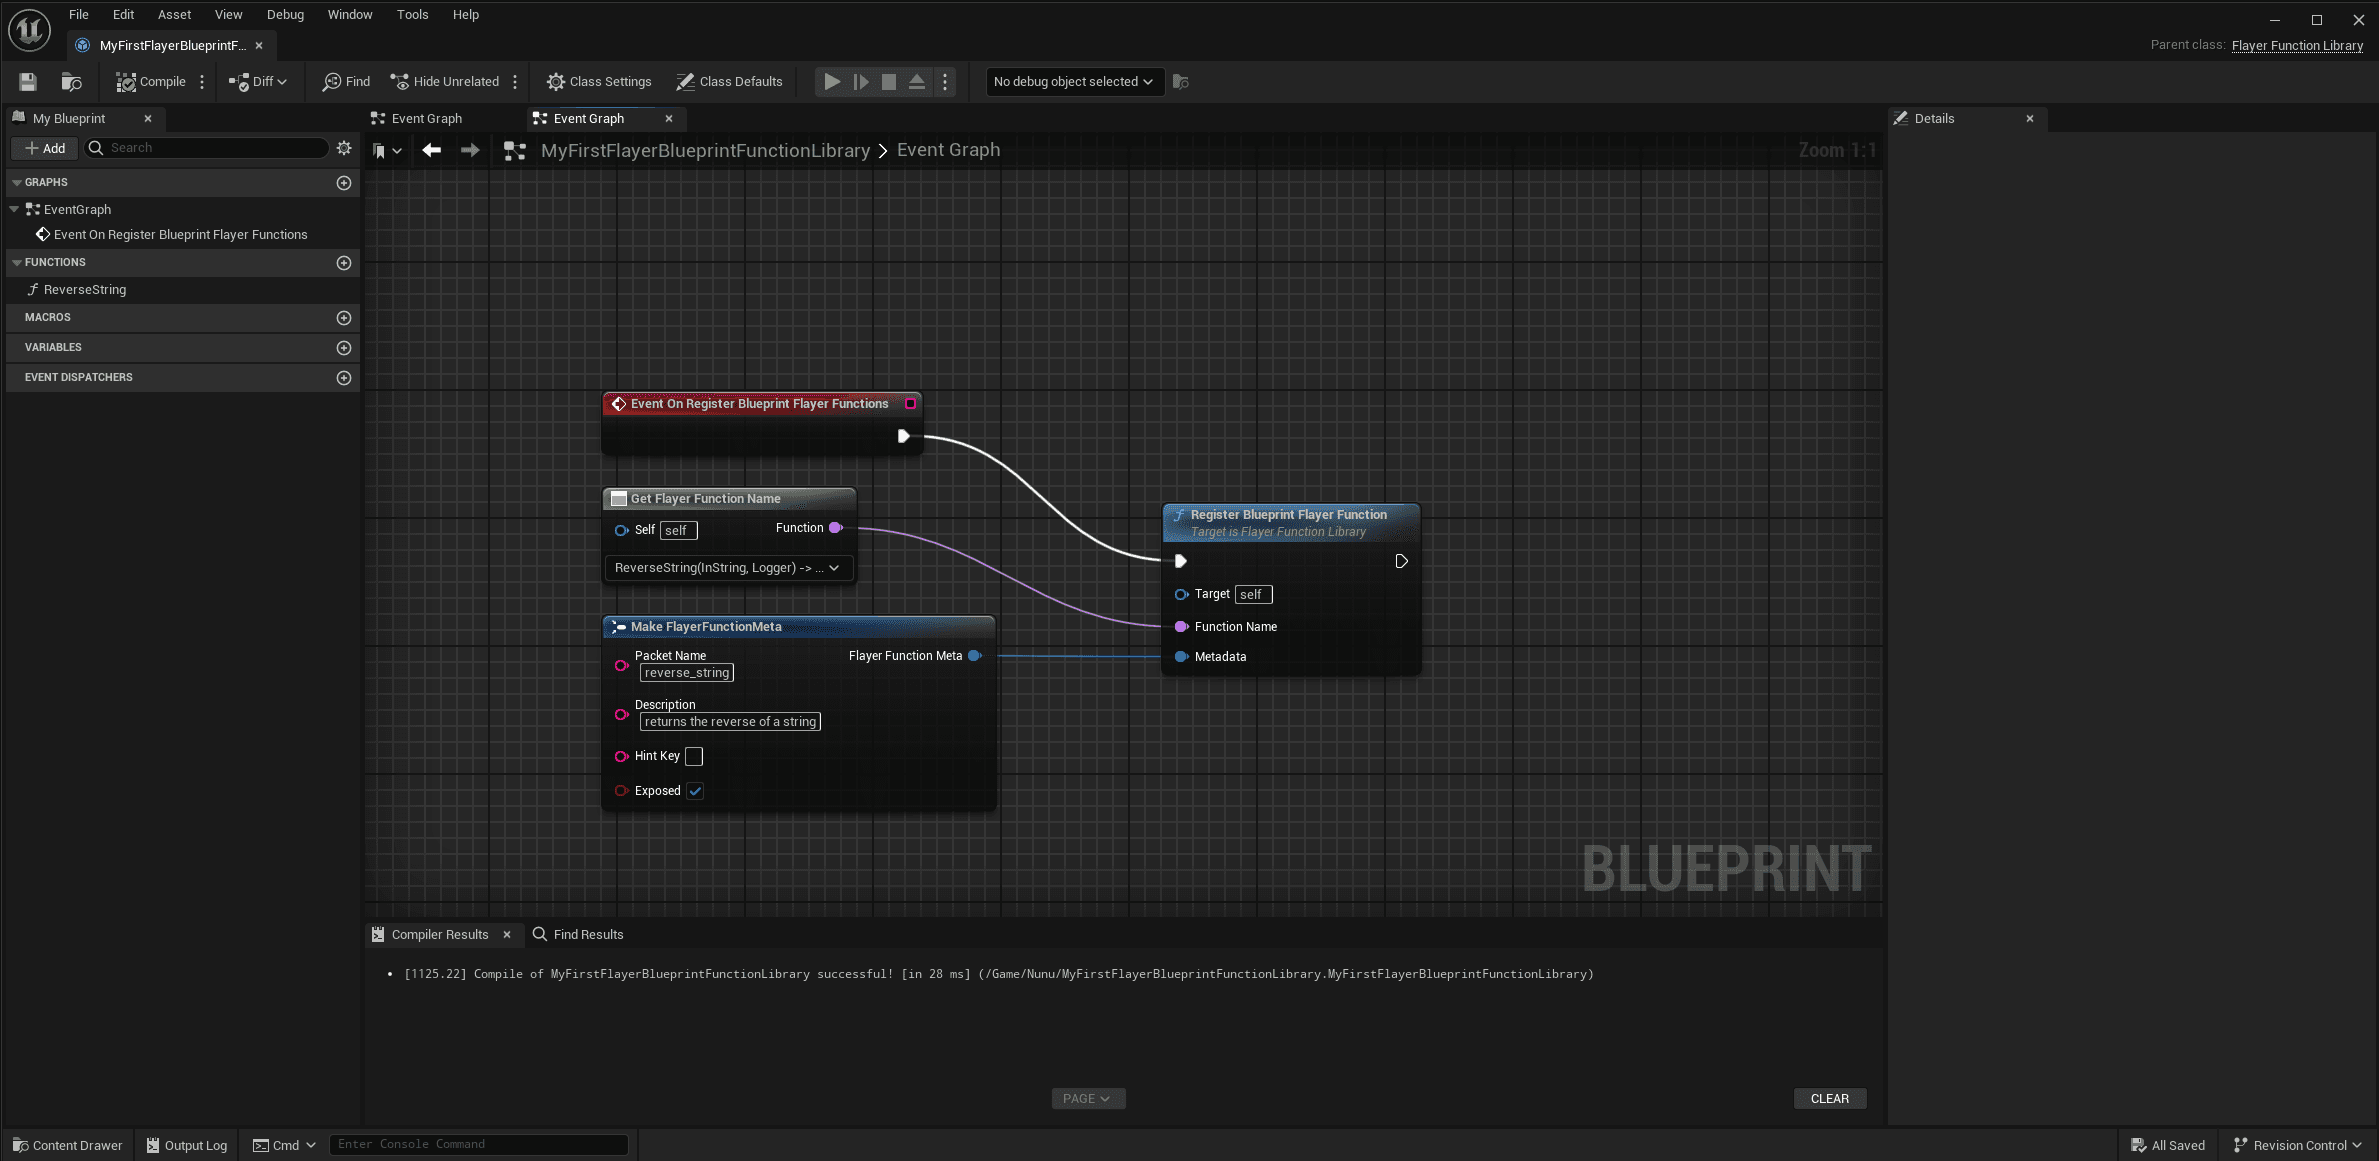
Register the function in the Library class
- In the EventGraph search for
Event On Register Blueprint Flayer Functionsand add the event node to the graph. - Add a
Register Blueprint Flayer Functionnode and connect the execution pins. - To the
Function Namepin, connect aGet Flayer Function Namenode and in the dropdown select the function you created. - Create FlayerFunctionMeta for the metadata pin to set function name and description
This is what it should look like:
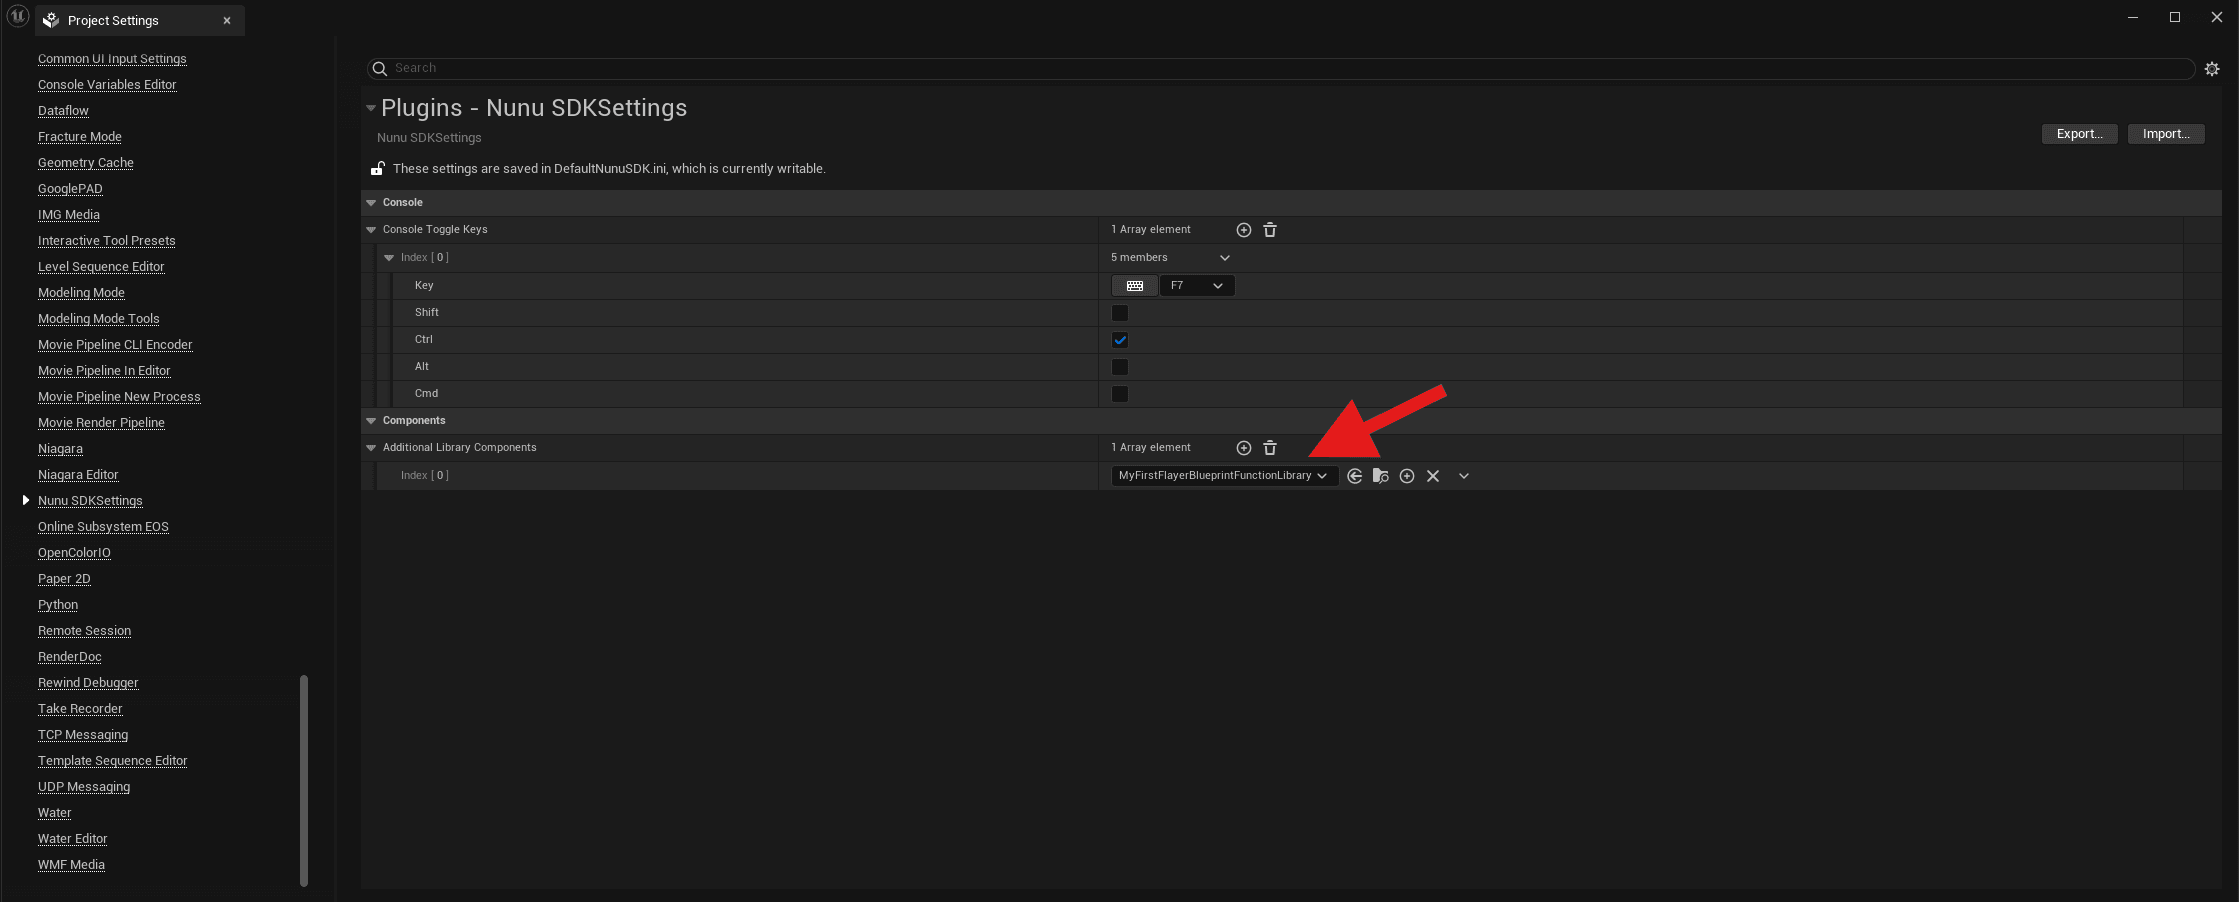
Register the library class in the nunu subsystem
To register the library class in the NunuSubsystem, we need to add it to the additional flayer function libraries in the project settings.
- Go to the
Edit > Project Settingsmenu. Scroll down to thePlugins > NunuSDKsection. And add theMyFirstFlayerBlueprintFunctionLibraryclass to theAdditional Library Componentsarray.