Repository
The Repository holds all existing test cases and lets you create new ones.
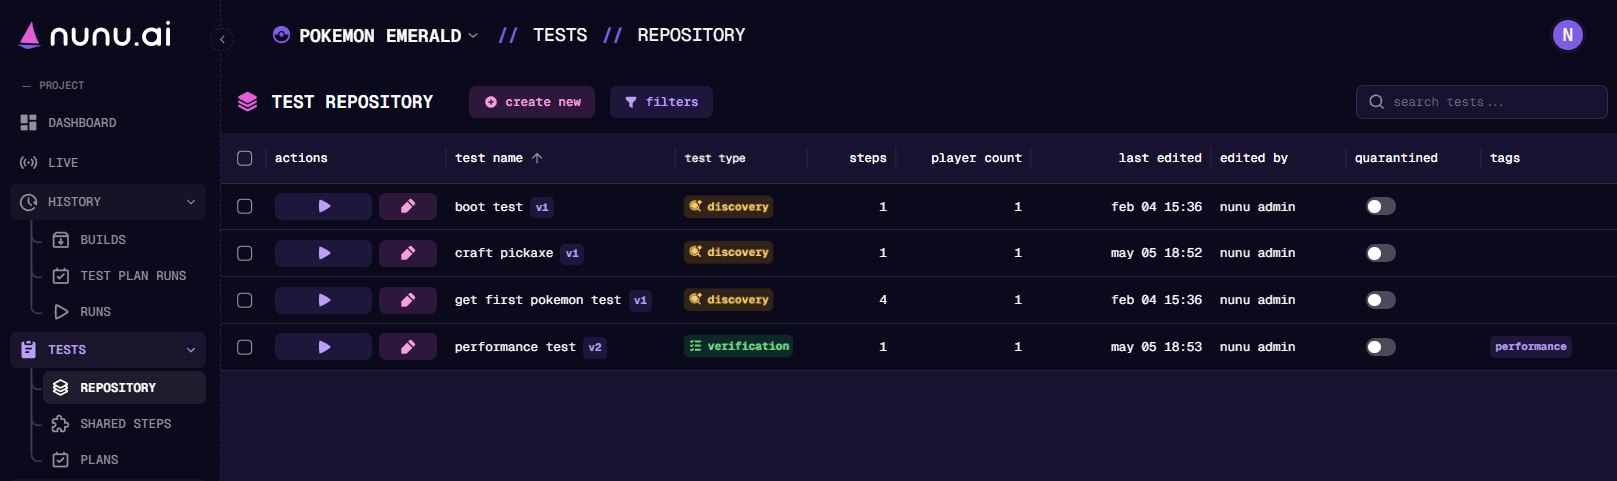
Overview
Here is a short explanation for each column:
- Actions: You can run a specific test by pressing the [ ]
play buttonand edit a test by pressing the [ ]edit button. - test name: The name of this test case.
- steps: How many steps the test contains.
- player count: For multiplayer tests, this indicates how many players are involved.
- last edited: When the test was last edited.
- quarantined: By quarantining a test, you exclude it from test plan executions in which the test is present. This is mostly used when you know that a test has issues and don’t want it included in the next test plan runs.
- tags: Tags help you better organize your test cases.
Run a Test
- Click on the [ ] Play button.
- Select the deployment configuration (which defines where to get your build) and choose the specific build version you want to use for this test run.
- Click on the “Confirm” button to begin the test execution.
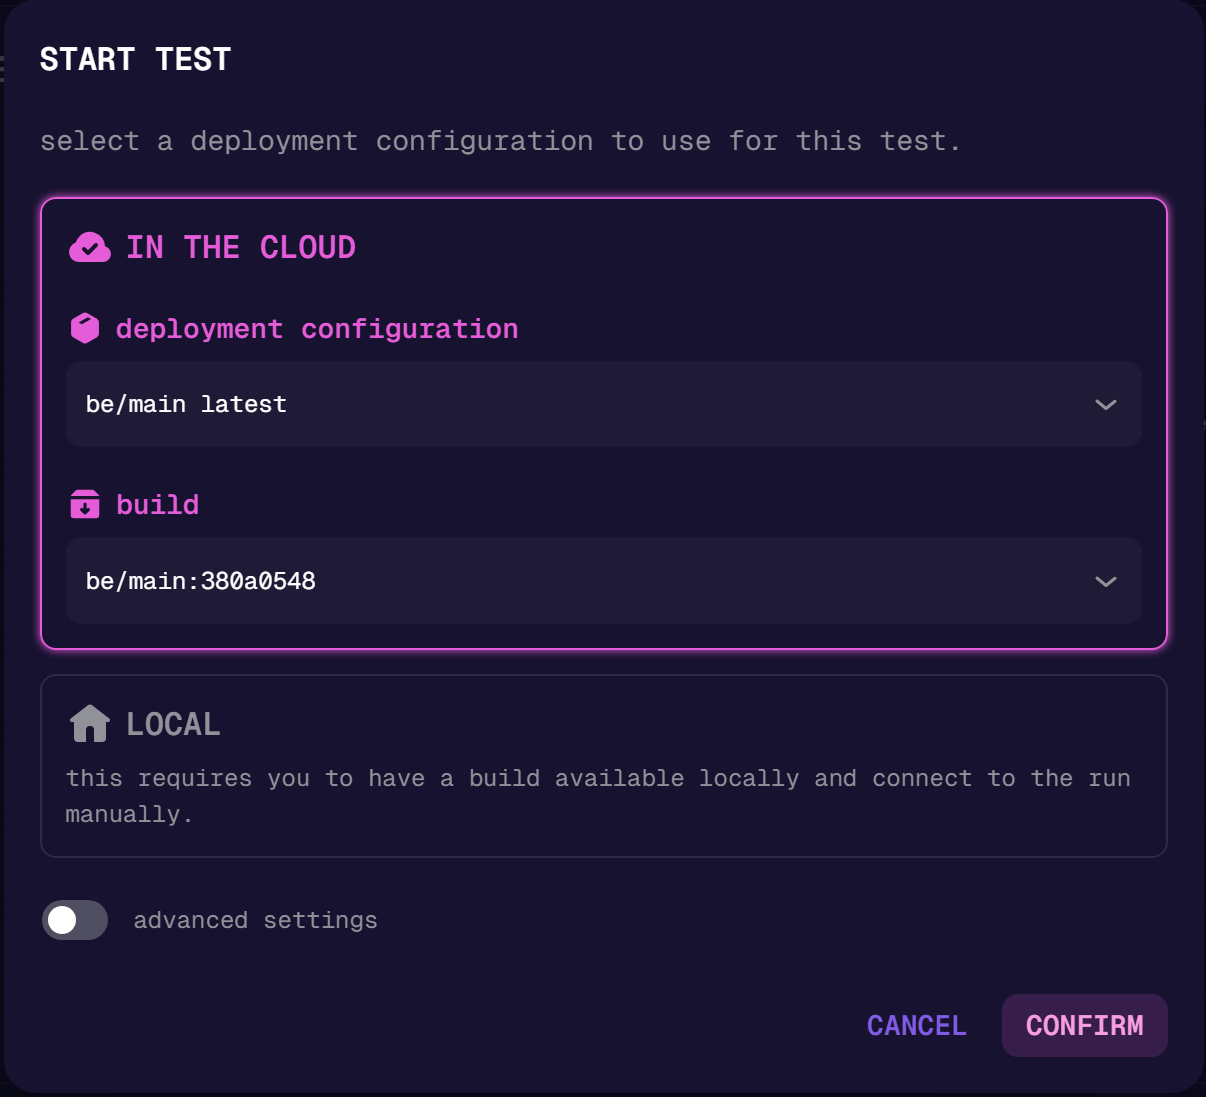
Once the test starts running, you’ll be redirected to the live view where you can monitor the AI agent’s progress in real-time.
Creating a New Test
Press the [ create new ] button to create a new test. You will then be presented with a test editor that looks like this:
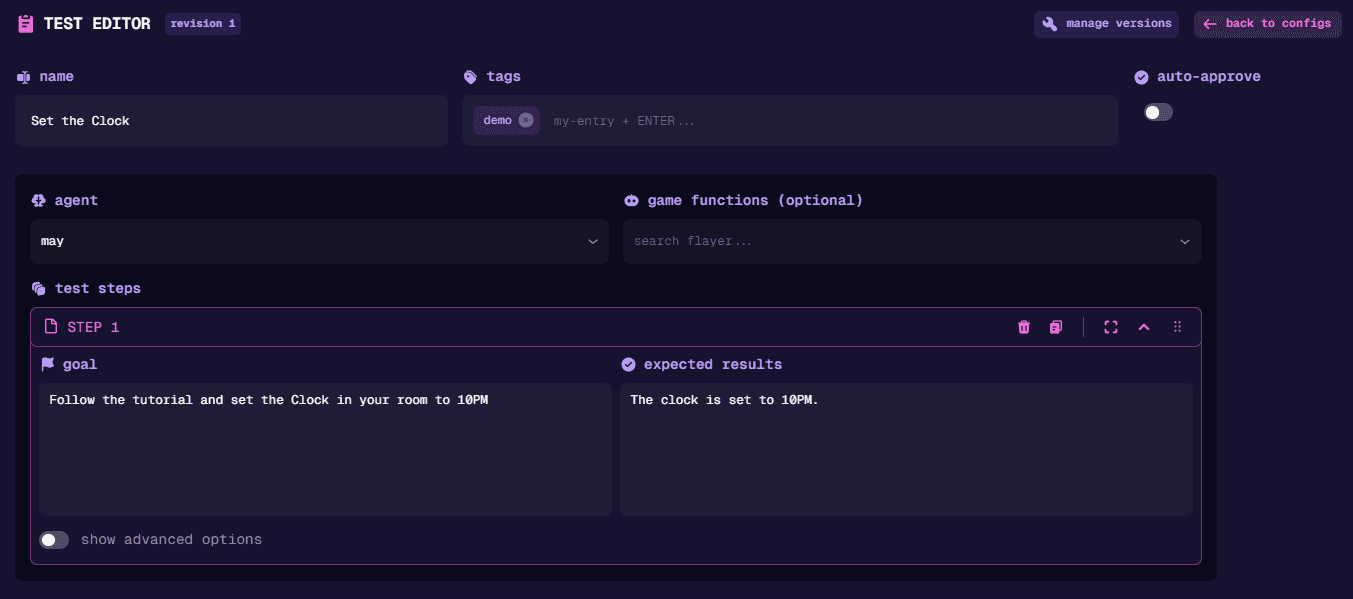
- name: A simple name for your test case.
- tags: To organize your tests, you can assign tags. There is one special tag called
performance. Read more about it below. - agent: The AI agent configuration that should be used to run your test. Most projects only have one configuration.
- game functions (optional): Defines what game functions configuration the test should run with. Check Game Funcs for additional information.
- test steps
- goal: Defines what you want the AI agent to accomplish (e.g., Craft a Pickaxe).
- expected results: Defines what you expect to happen (e.g., The pickaxe is added to your inventory and you receive 100 gold).
Read the Writing tests - Getting Started guide to understand how you should write your test cases.
Advanced Options
You can toggle the show advanced options to see additional settings:
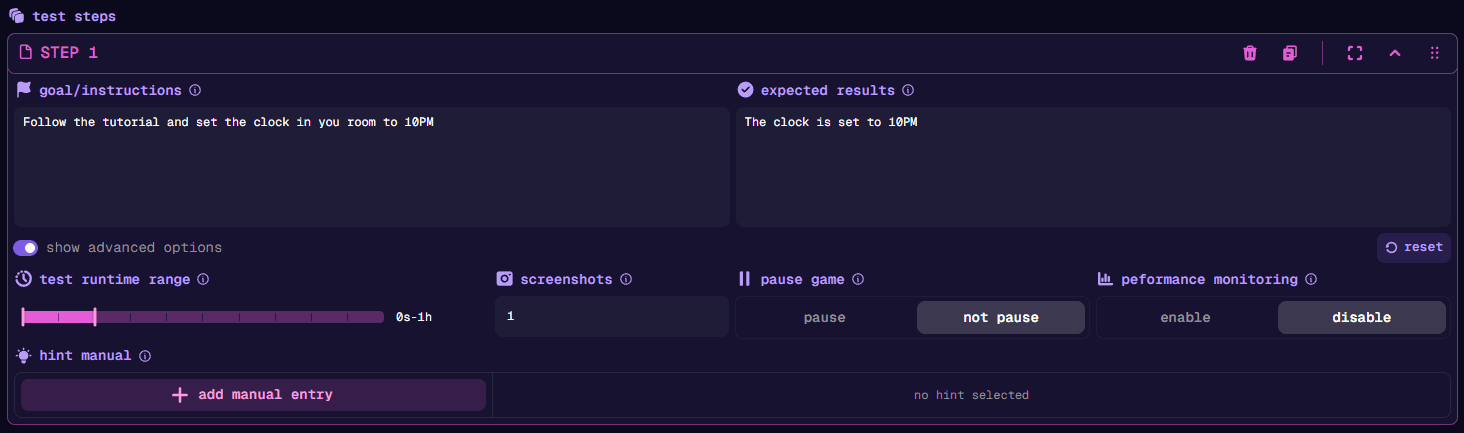
- Test runtime range: Minimum and maximum runtime for the test step.
- Screenshots: Number of screenshots the agent should capture during an action turn.
- Pause game: Decide if the game should pause during the AI agent’s thinking time.
- Performance monitoring: Enable tracking of metrics like fps, memory, frame time, and CPU/GPU usage.
- Hint manual: Provide hints to the AI Agent for this step.
Adding More Steps
Adding an additional step is very easy. Just click on the [ new step ] button in the action bar at the bottom of the editor.

Collections
You can group multiple test steps together into what’s called a Collection. There are two main reasons why you might want to do this:
- Organization: If your test has many steps, grouping some steps together can help you and others maintain a better overview.
- Promote to Shared Steps: You can promote a
Collectionto aShared Steps Collection(available at Shared Steps) to make it available for other tests.
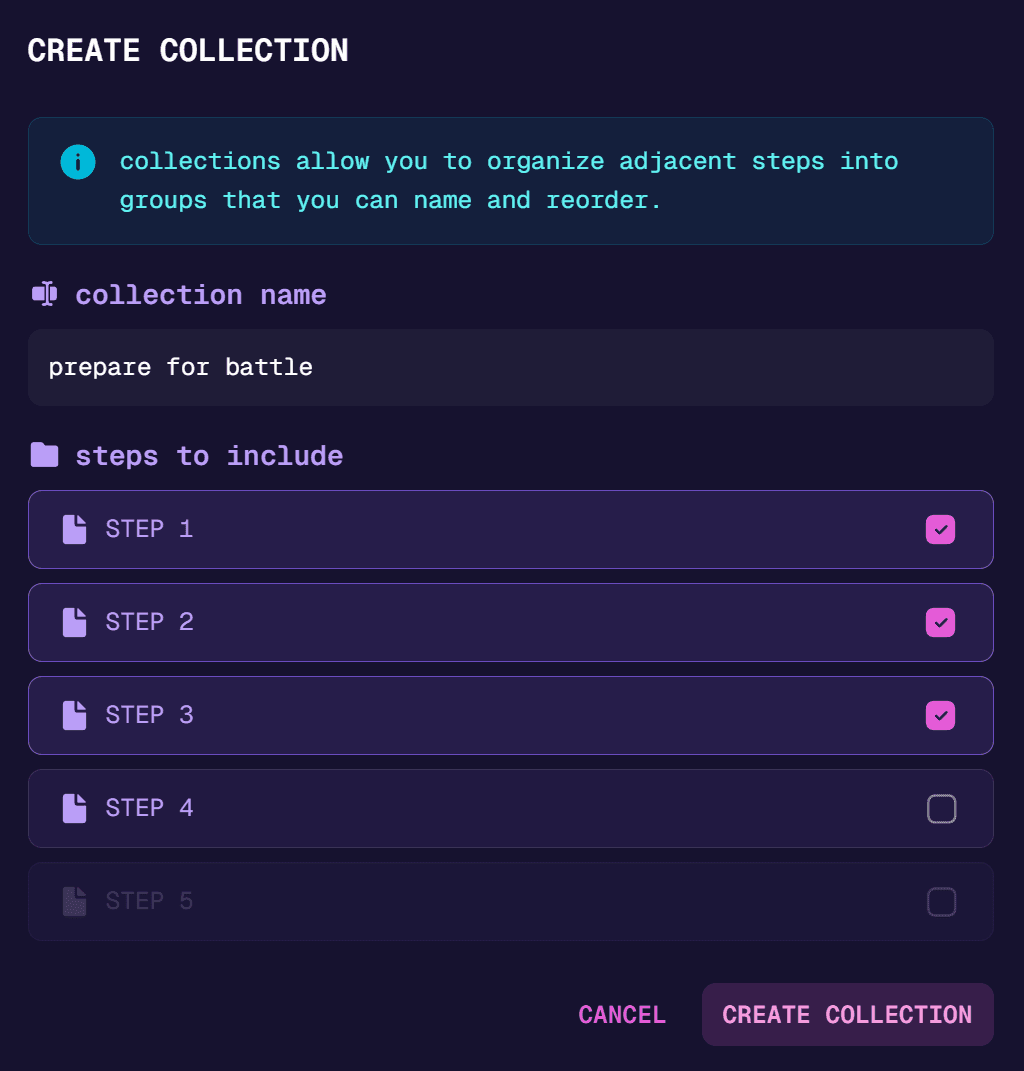
How to Create a New Collection
To create a Collection, press the [ ] button on the action bar. Then select all steps that you want to group together and give your Collection a name.
Below is an example of how the editor looks when grouping step1 and step2 into a ‘prepare for battle’ Collection and the rest into a ‘fight the boss’ Collection.
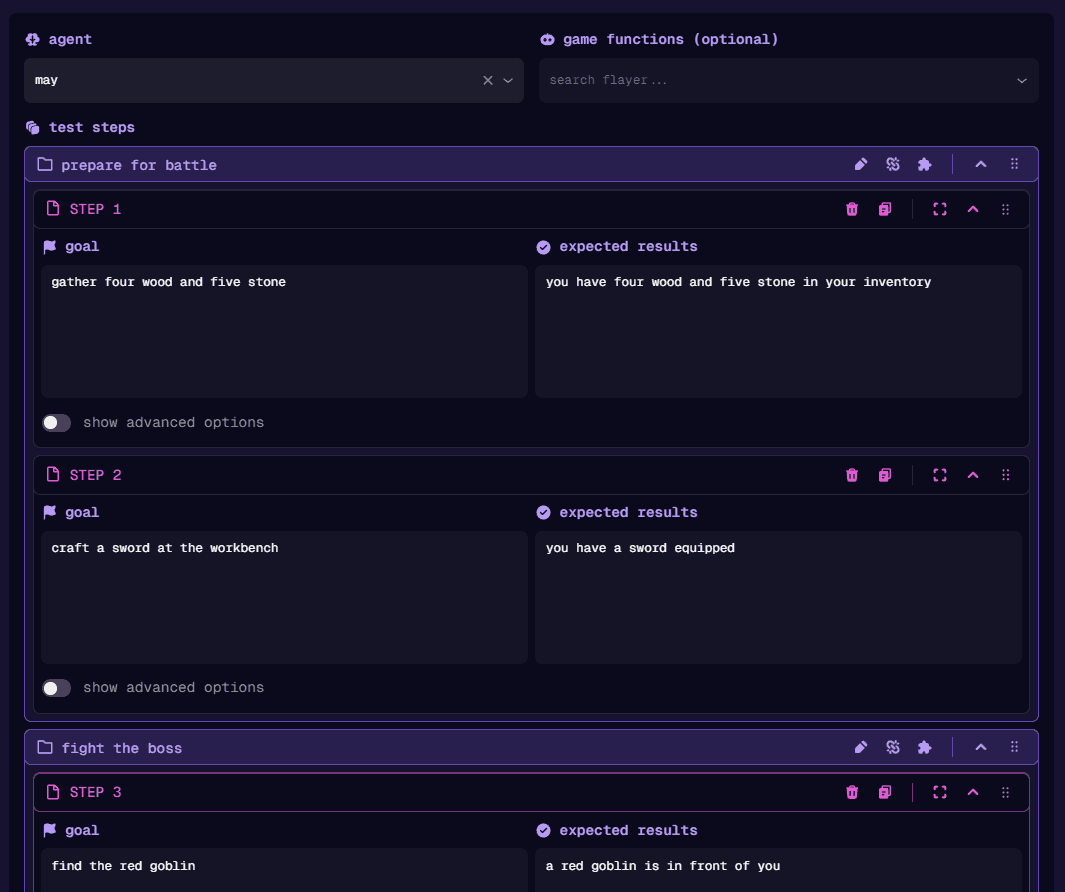
Just like steps, you can drag and drop Collections to reorder them. You can even drag steps in and out of existing Collections.
Settings

- [ ]: Rename the Collection.
- [ ]: Dissolve the Collection, which ungroups the steps.
- [ ]: Promote the Collection into a Shared Step Collection.
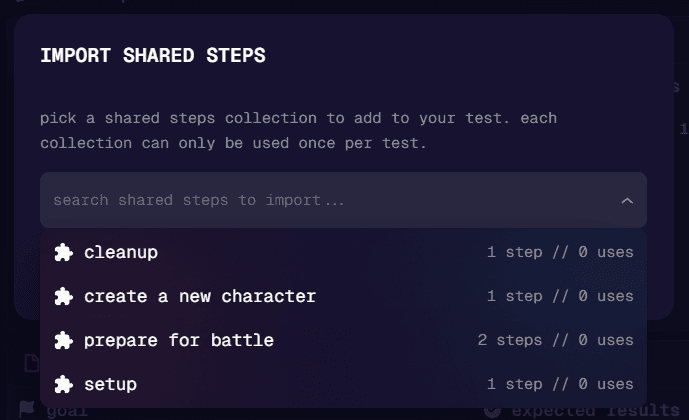
Import a Shared Steps Collection
Shared steps are steps that can be reused by multiple tests. This is especially useful if you have the same setup steps for all of your tests (e.g., waiting for the game to finish loading and accepting Terms of Service).
Read the Shared Steps page for additional information.
Click on the [ import ] button in the action bar at the bottom of the editor and select the Shared Steps Collection you wish to import.
After importing a Shared Steps Collection, your editor should look similar to this:
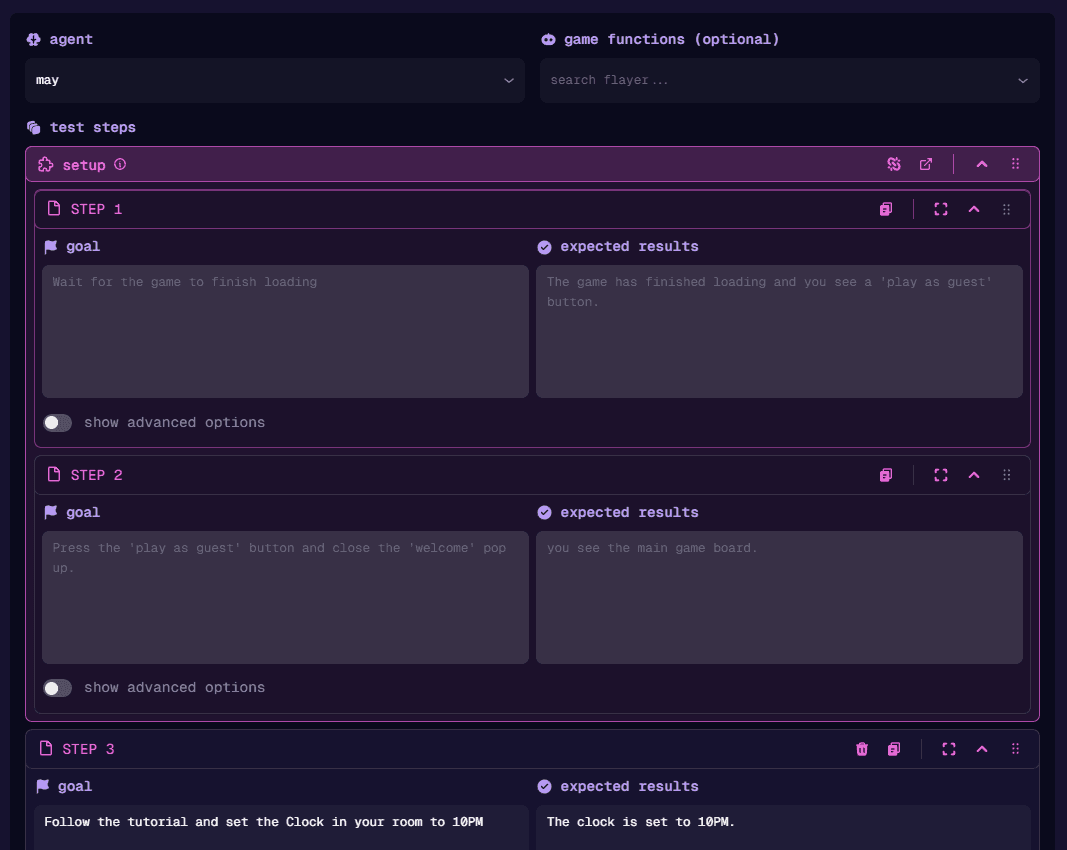
To remove the Shared Steps Collection, simply press the icon.
Note that you can’t edit the Shared Steps directly in your test. If you want
to change them, you must do so in the Shared Steps tab, and the changes will
apply to all tests using those Shared Steps.